> ## Documentation Index
> Fetch the complete documentation index at: https://docs.beeble.ai/llms.txt
> Use this file to discover all available pages before exploring further.
# Unreal Engine Plugin
> Relight directly inside Unreal Engine with full PBR passes
## Prerequisites
* Unreal Engine 5.3+ (tested on Windows)
* Beeble Unreal Engine Plugin - [**Download HERE**](https://release.beeble.ai/plugins/unreal/latest.zip)
## Step-by-Step Guide
### 1. Preparation
#### 1.1 Plugin Download
1. Download **the UE plugin** from [**HERE**](https://release.beeble.ai/plugins/unreal/latest.zip)
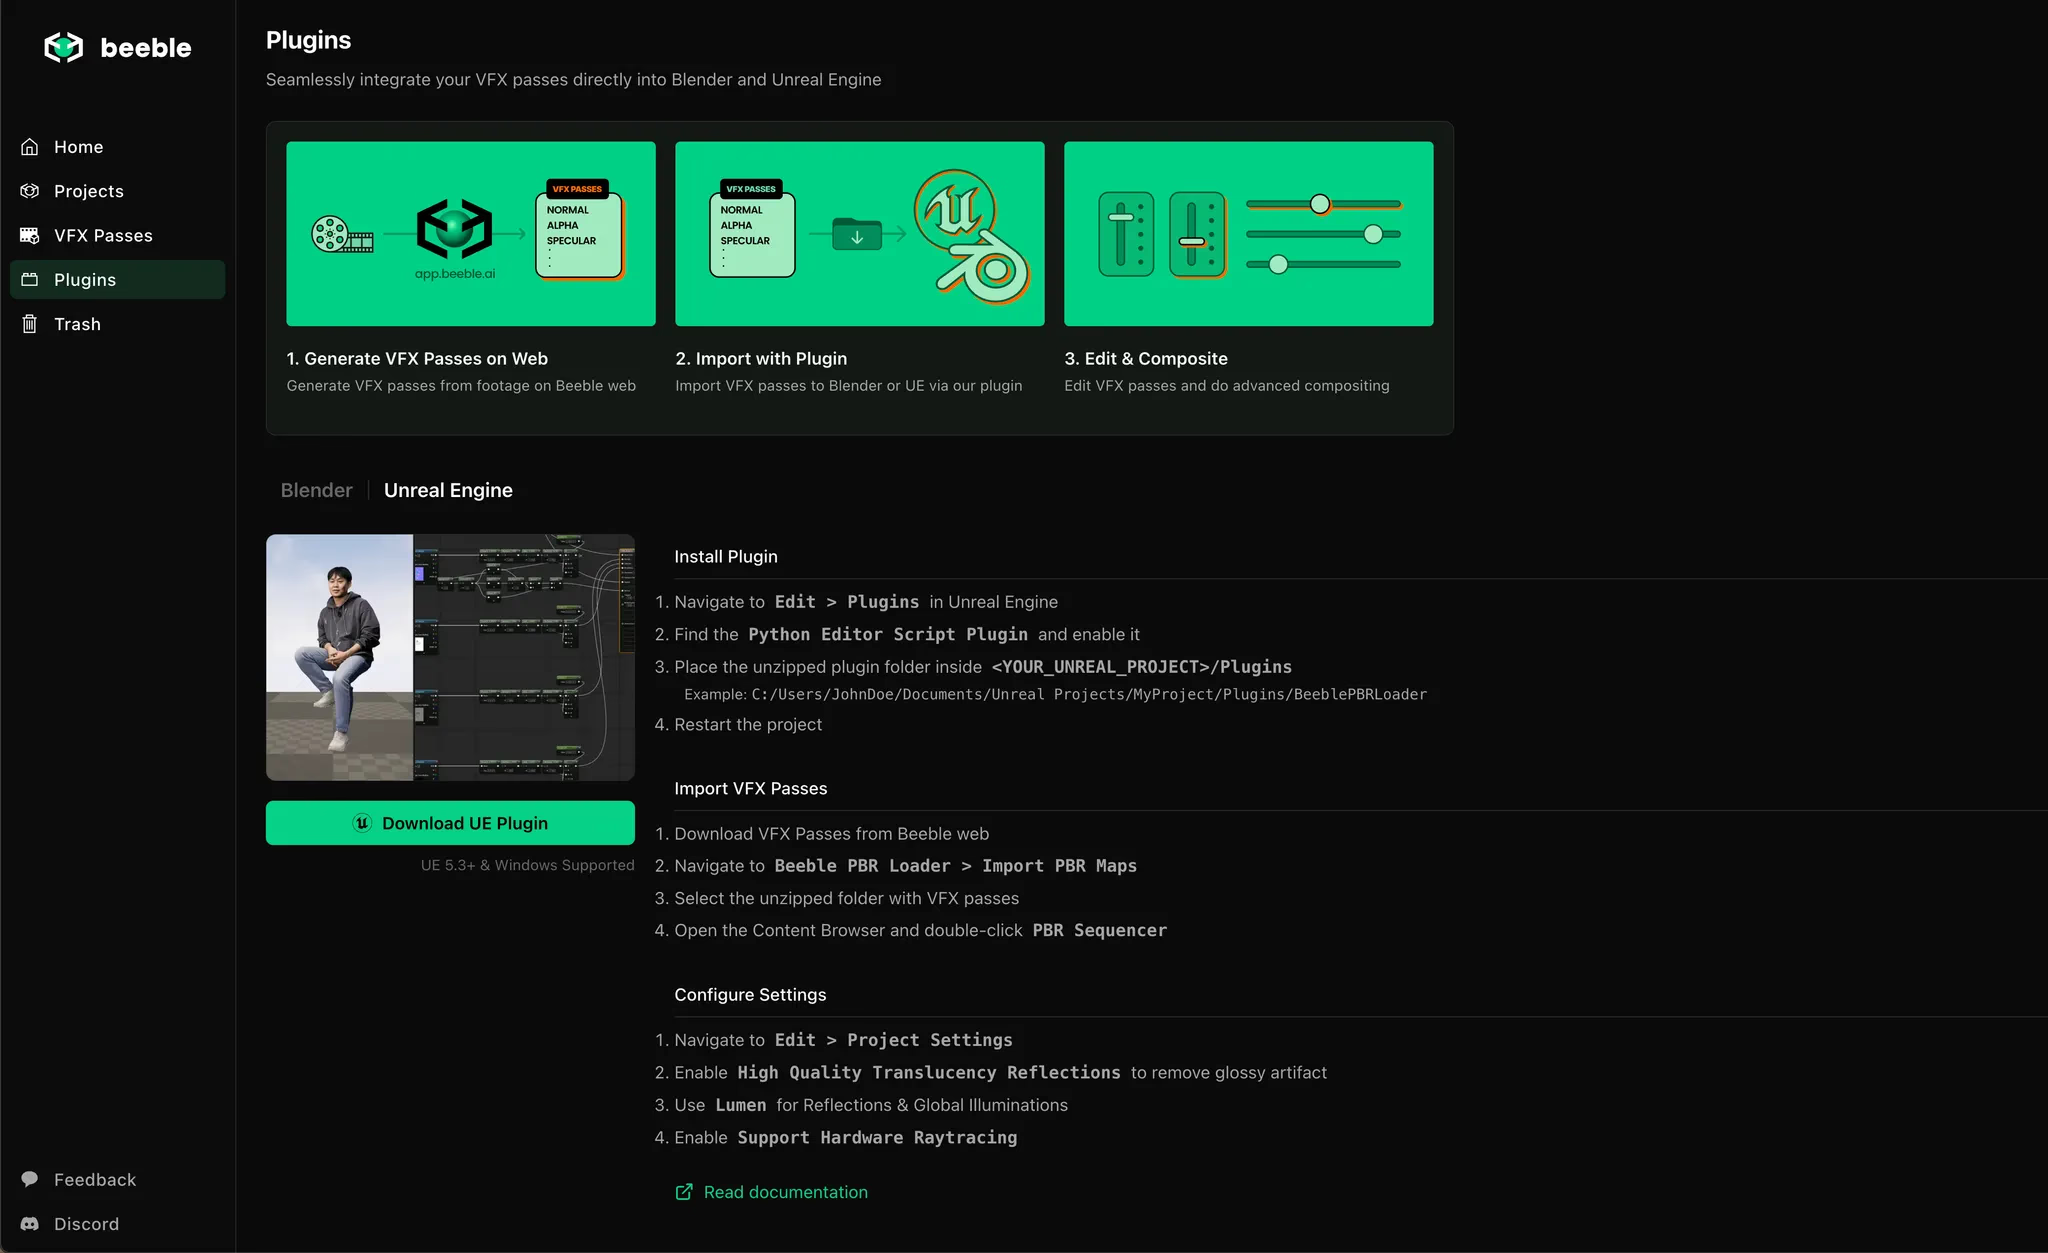
2. Unzip the plugin file.
#### 1.2 Start Unreal
1. Launch Unreal Engine.

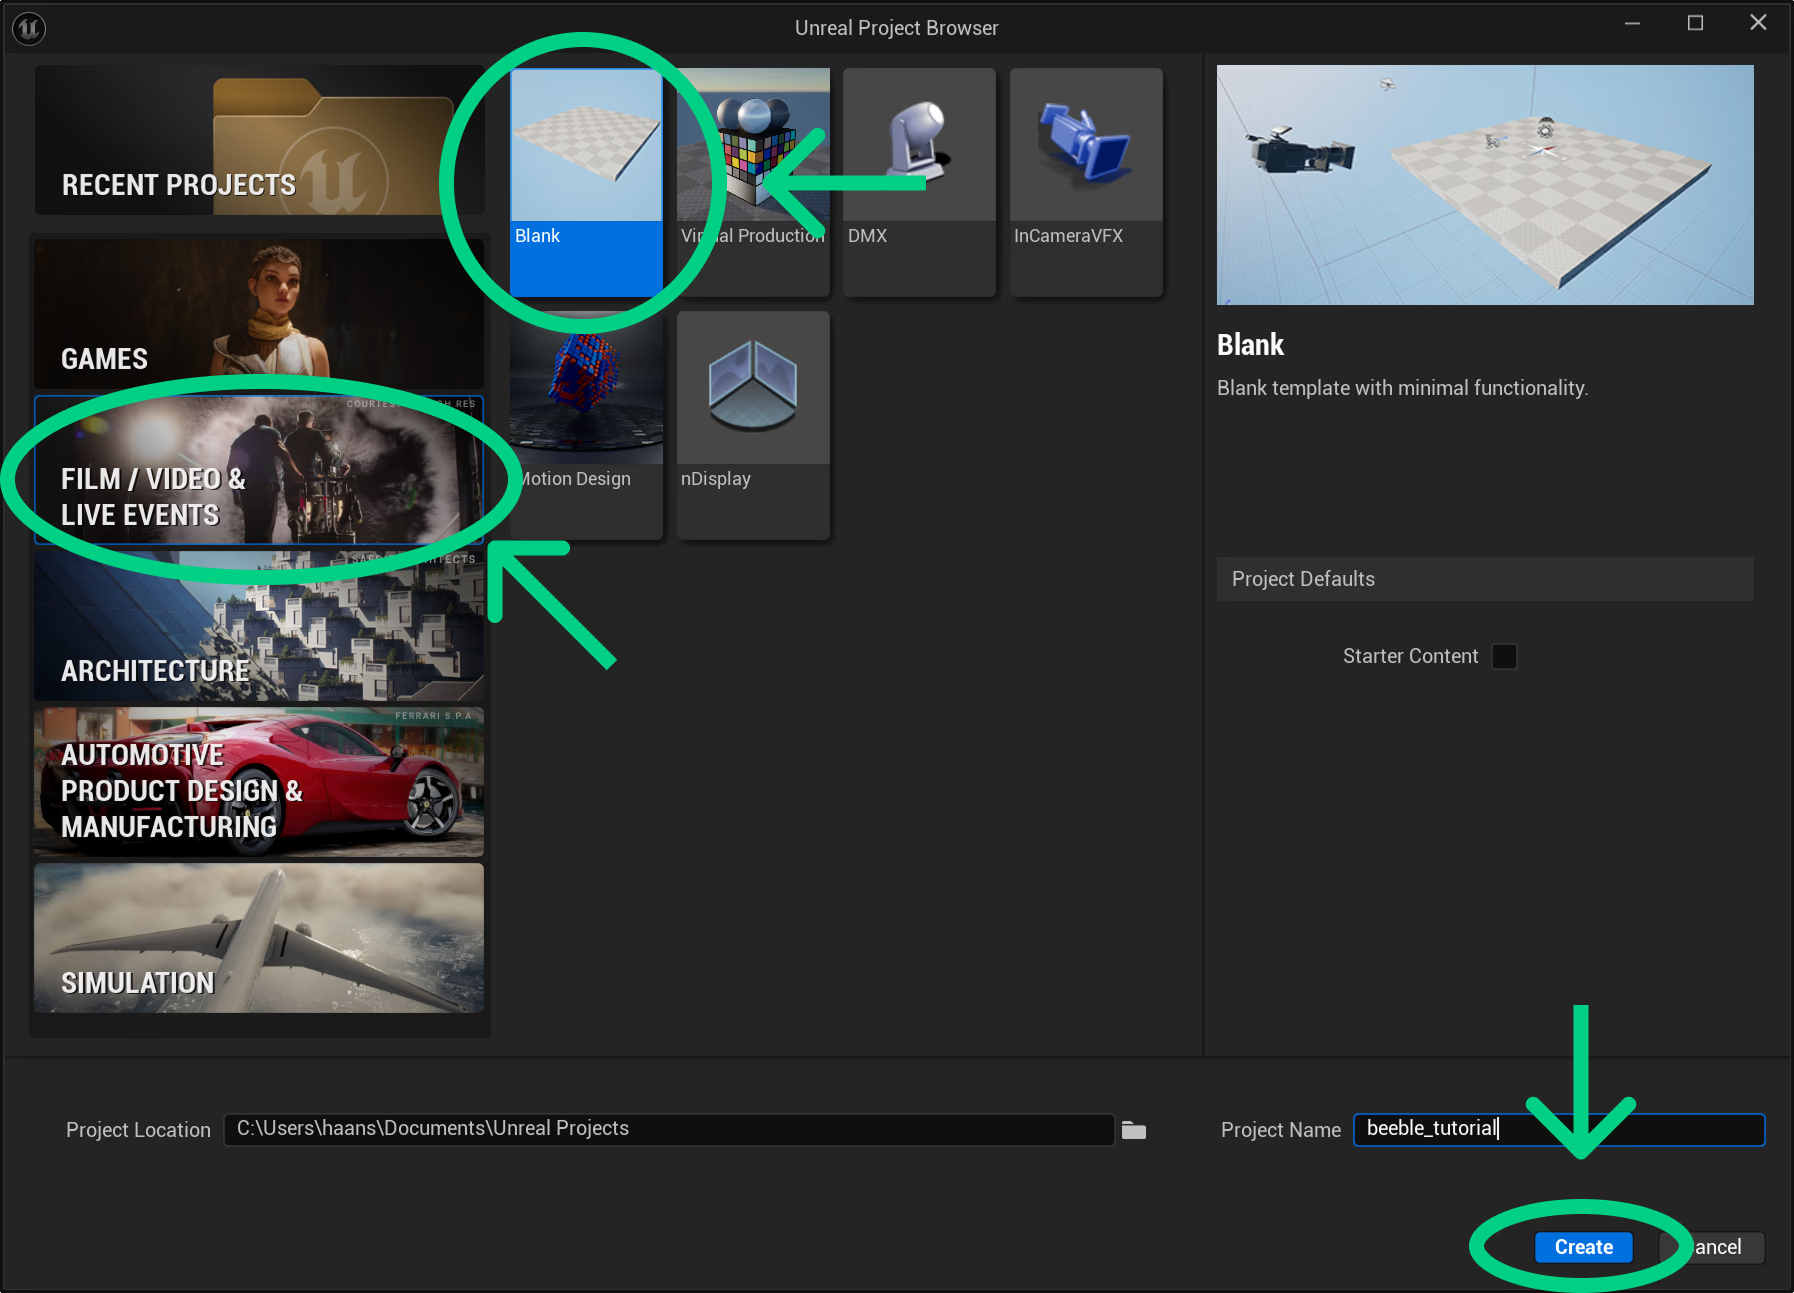
2. Open a new project; we recommend choosing a blank template in the FILM / VIDEO & LIVE EVENTS category.
#### 1.3 Enable Required Editor Plugin
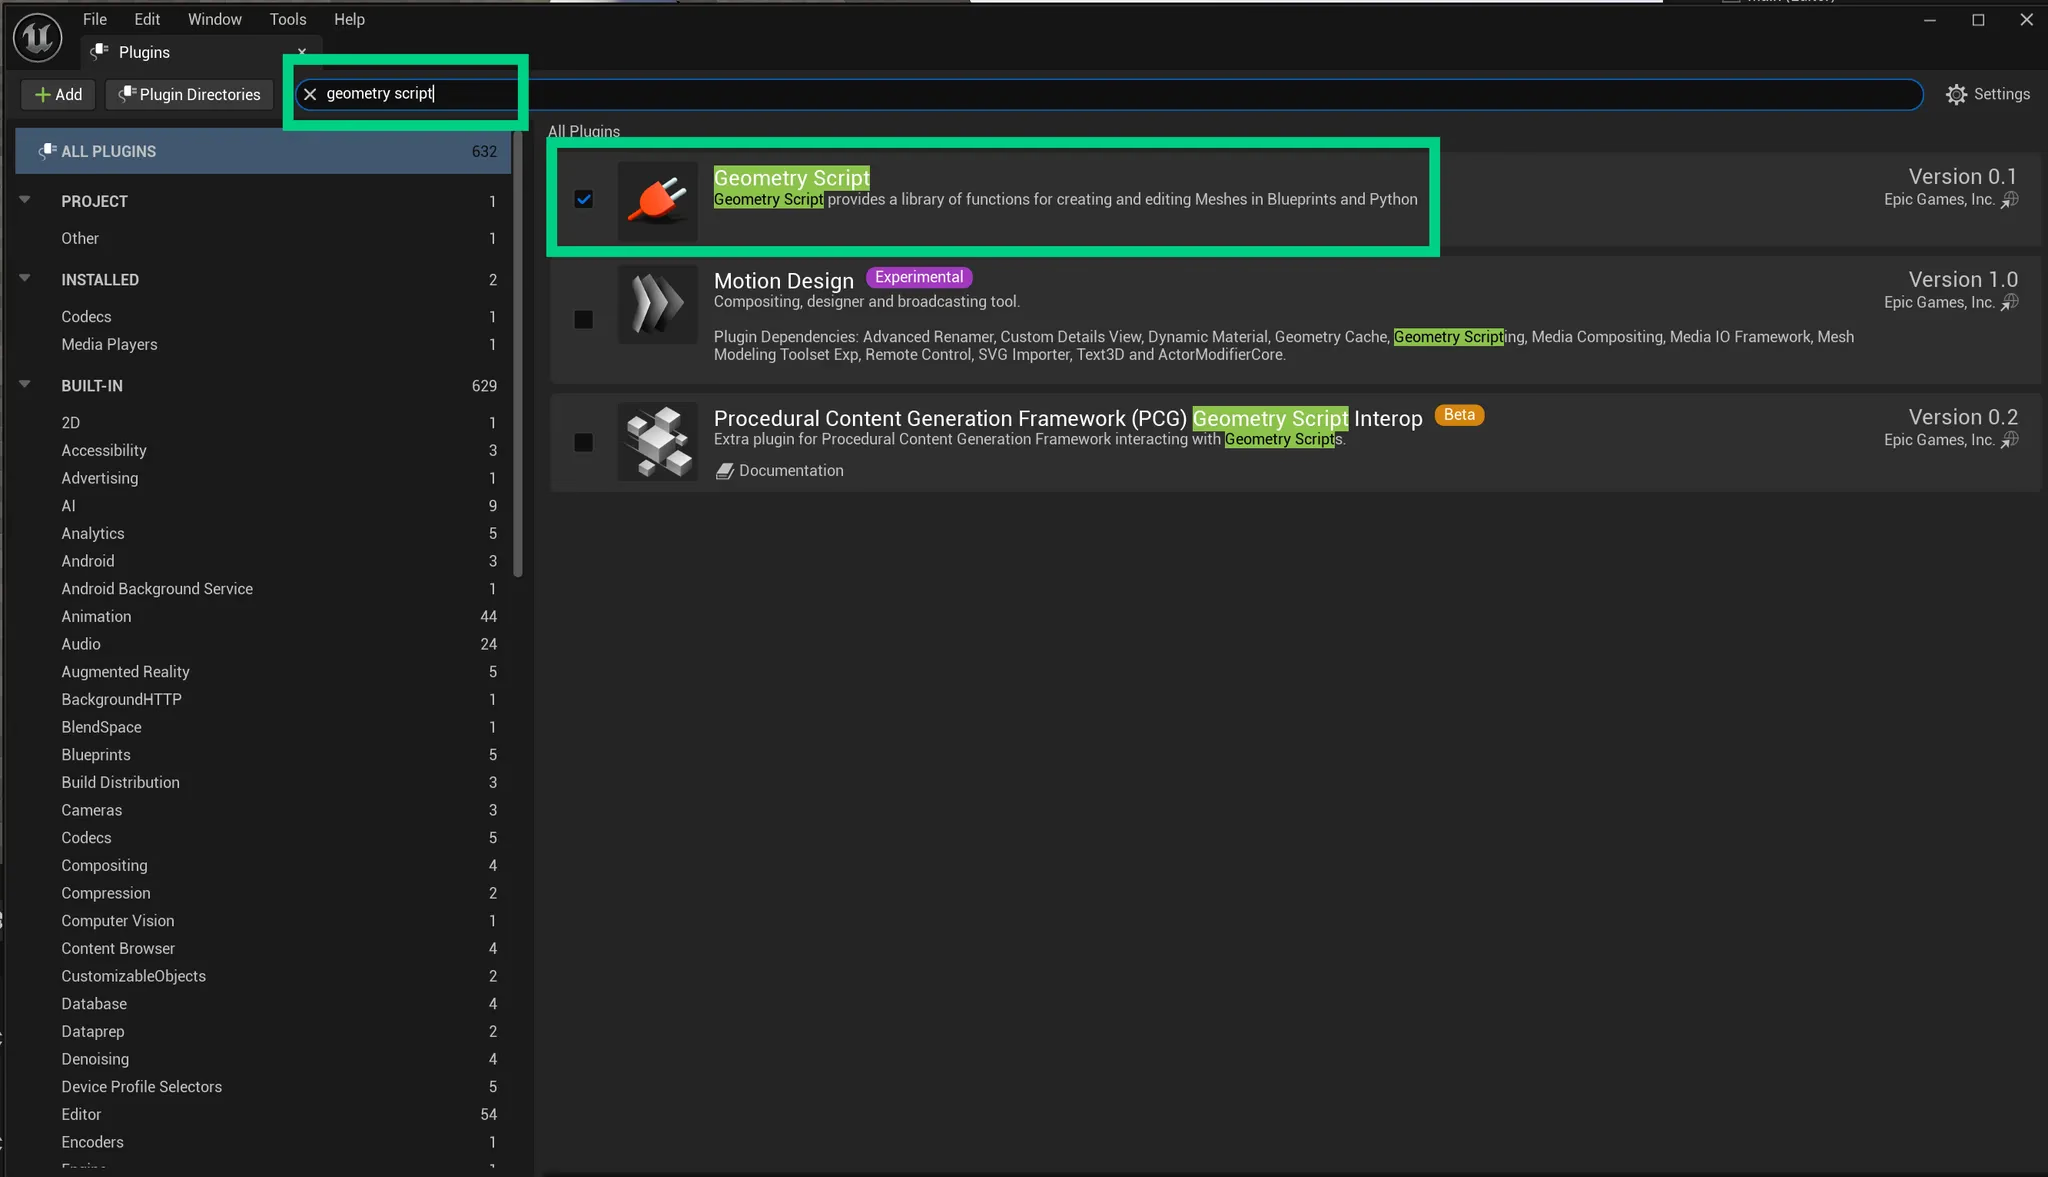
> 💡 To ensure full functionality of the plugin, make sure the following Unreal Engine plugins are enabled: **Python Editor Script Plugin & Geometry Script Plugin**
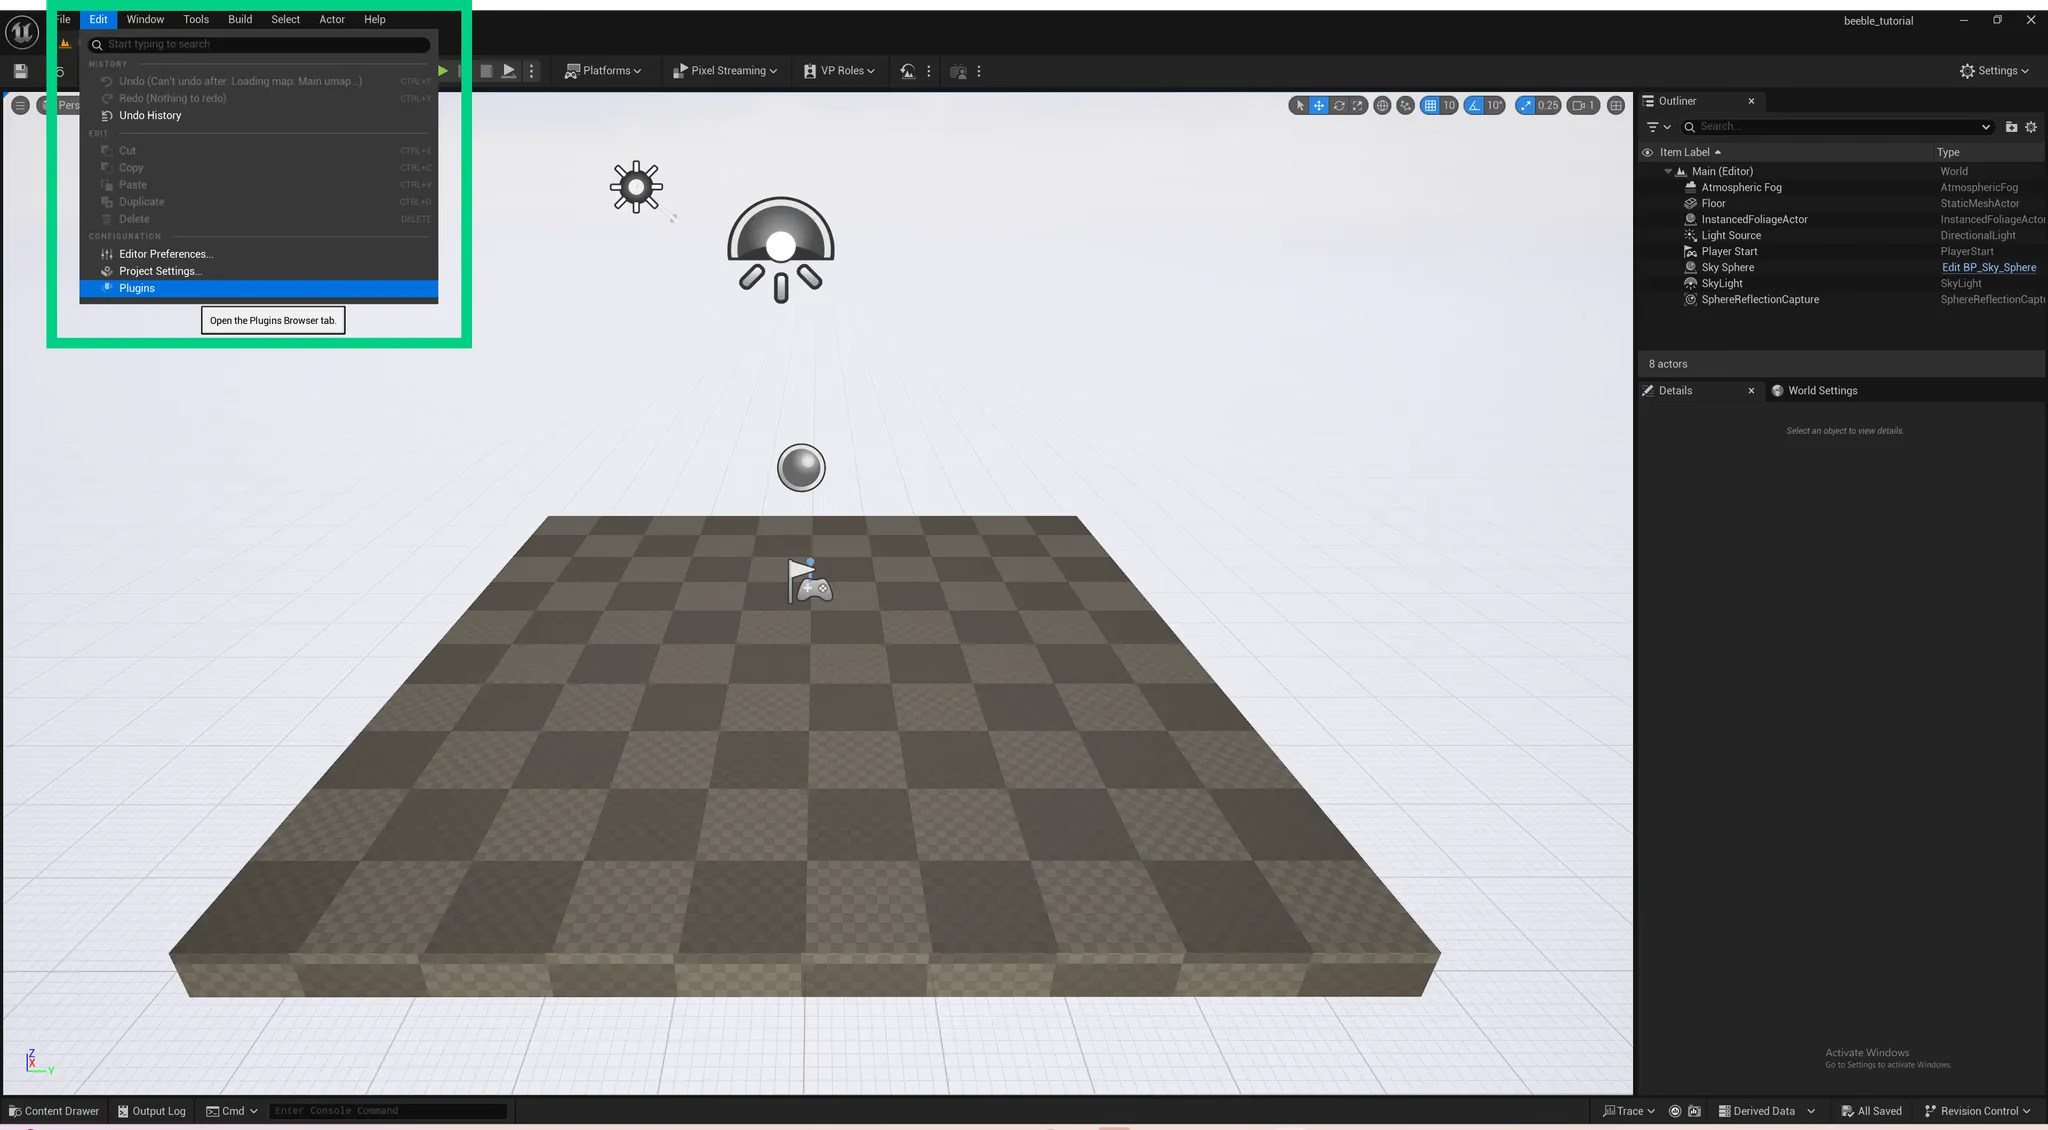
1. Navigate through `Edit` > `Plugins`.
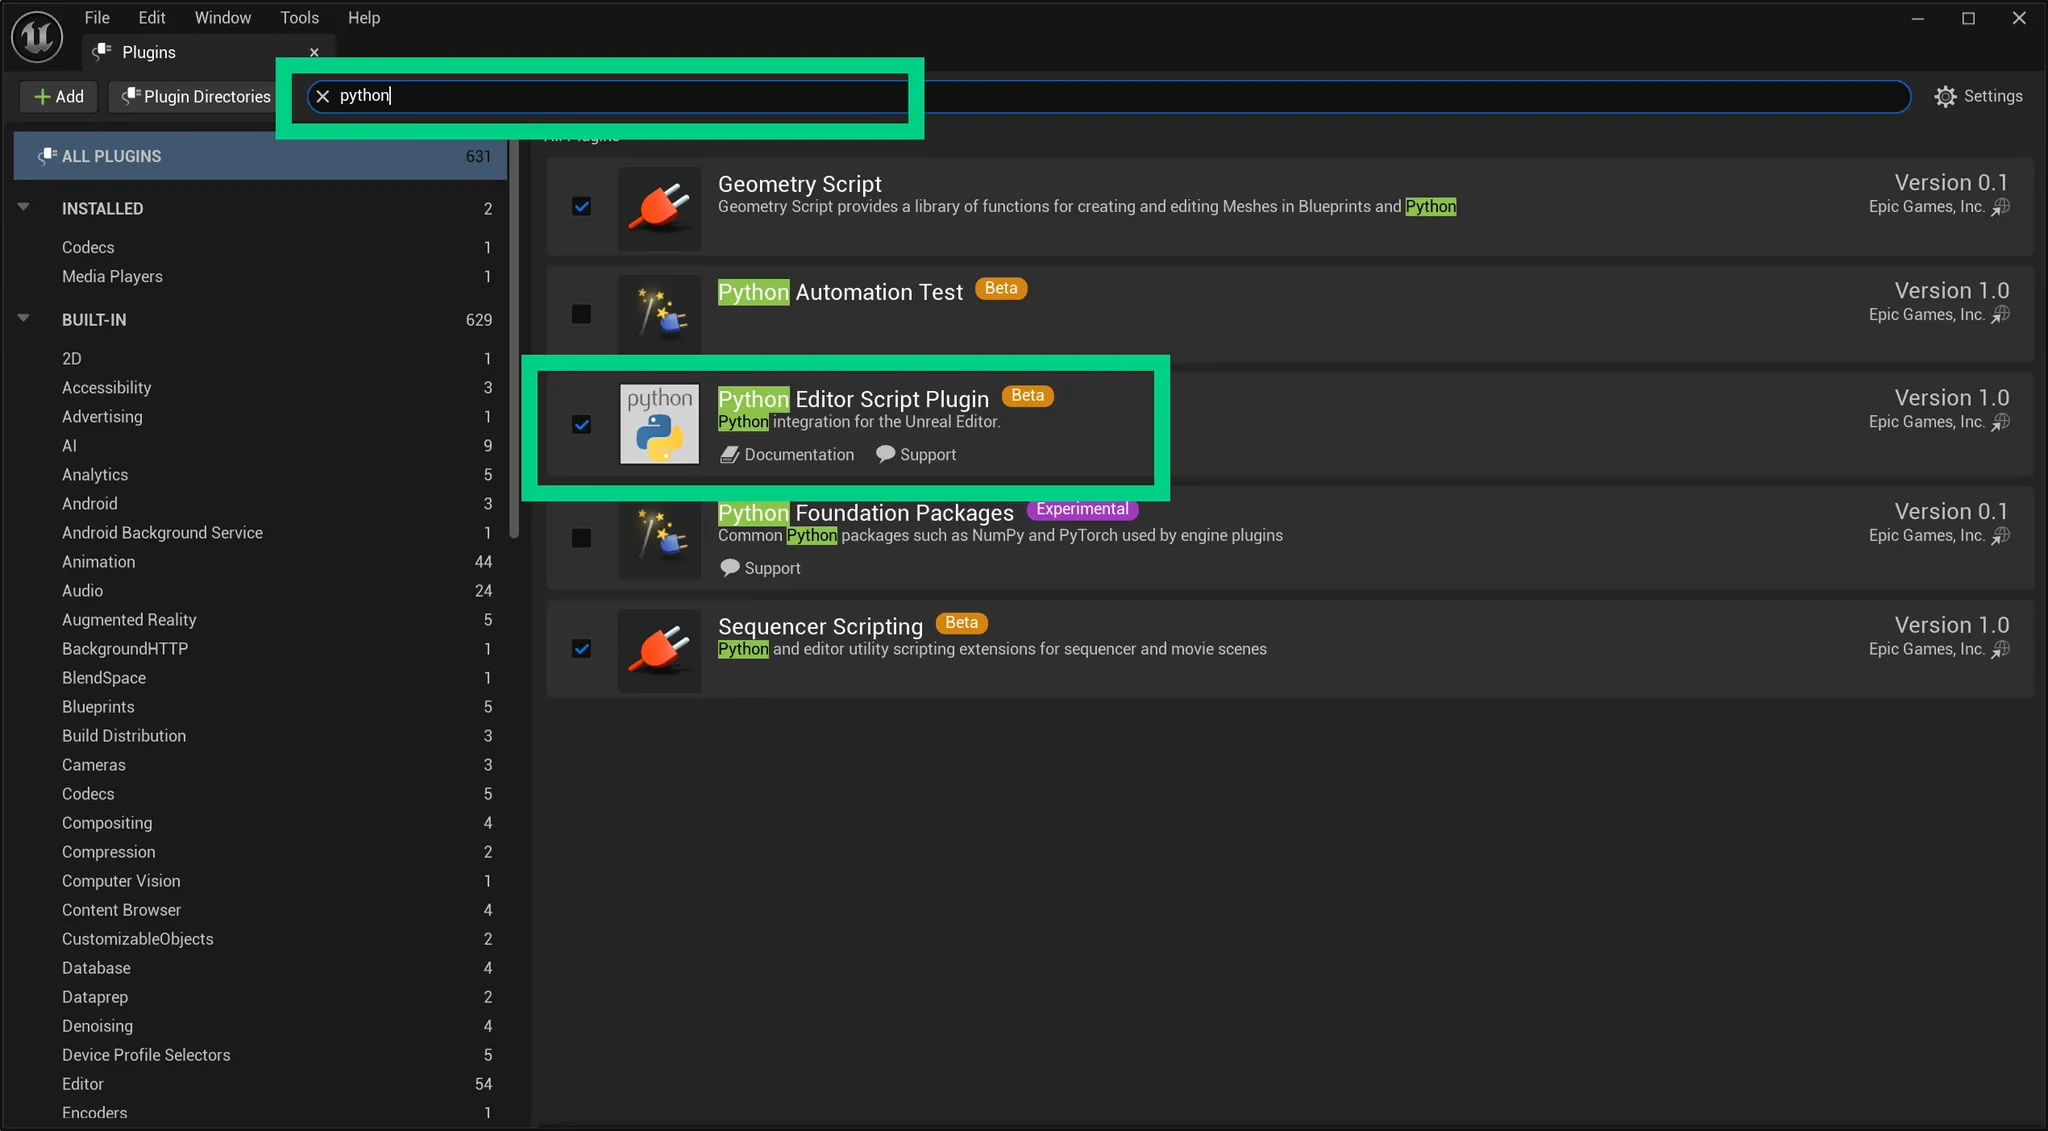
2. Find the `Python Editor Script Plugin` and check the box next to it if it's not already activated.
3. Find the `Geometry Script Plugin` and check the box next to it if it's not already activated.
#### 1.4 Place the Beeble plugin folder inside Unreal Project Plugins folder
> **⚠️ Beeble Plugin is project-based. Do not install it globally. Place it in `YourProject/Plugins` (usually under `Documents/Unreal Projects`).**
1. Open the File Explorer of your Unreal Project.
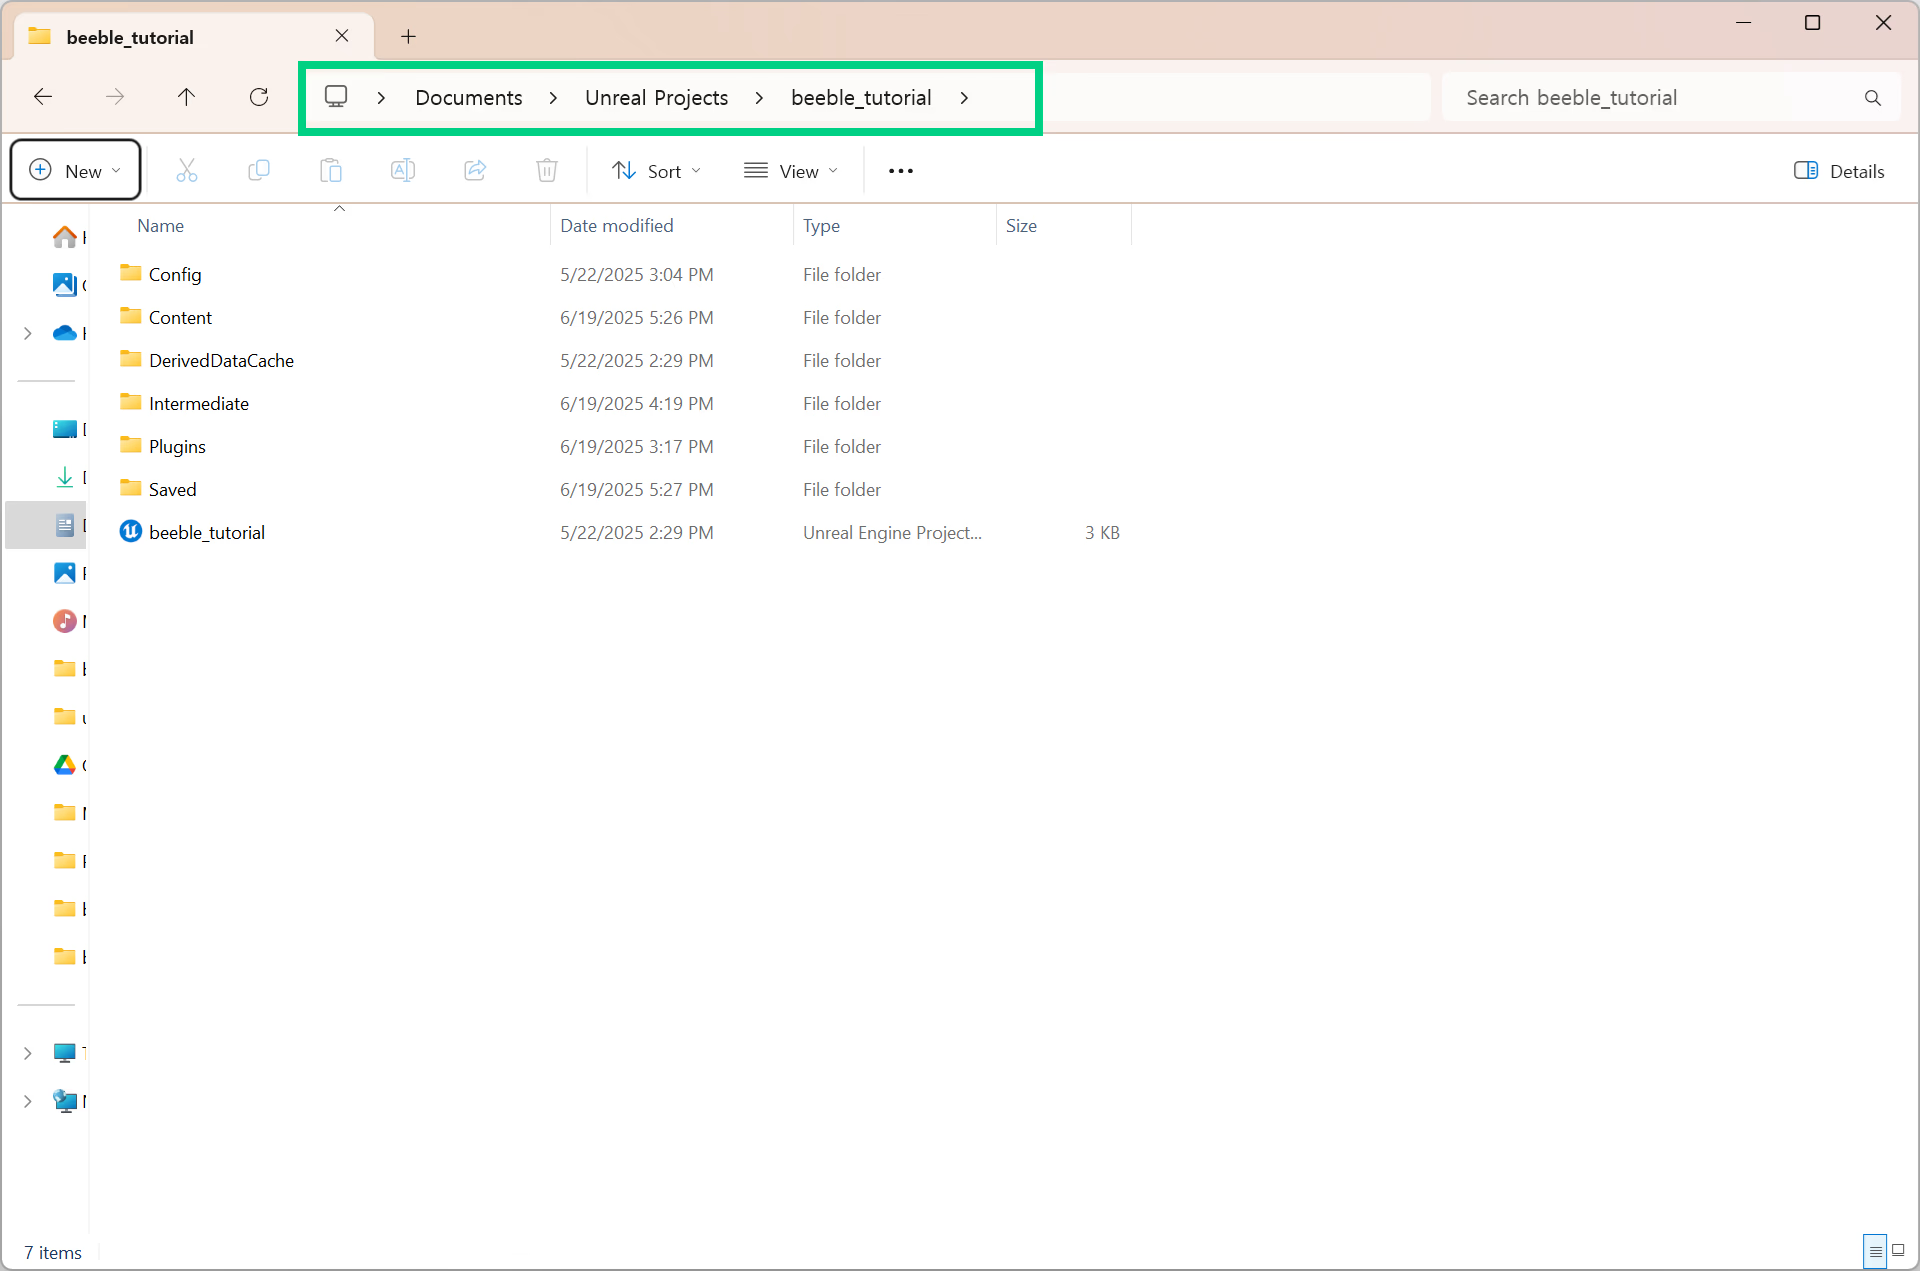
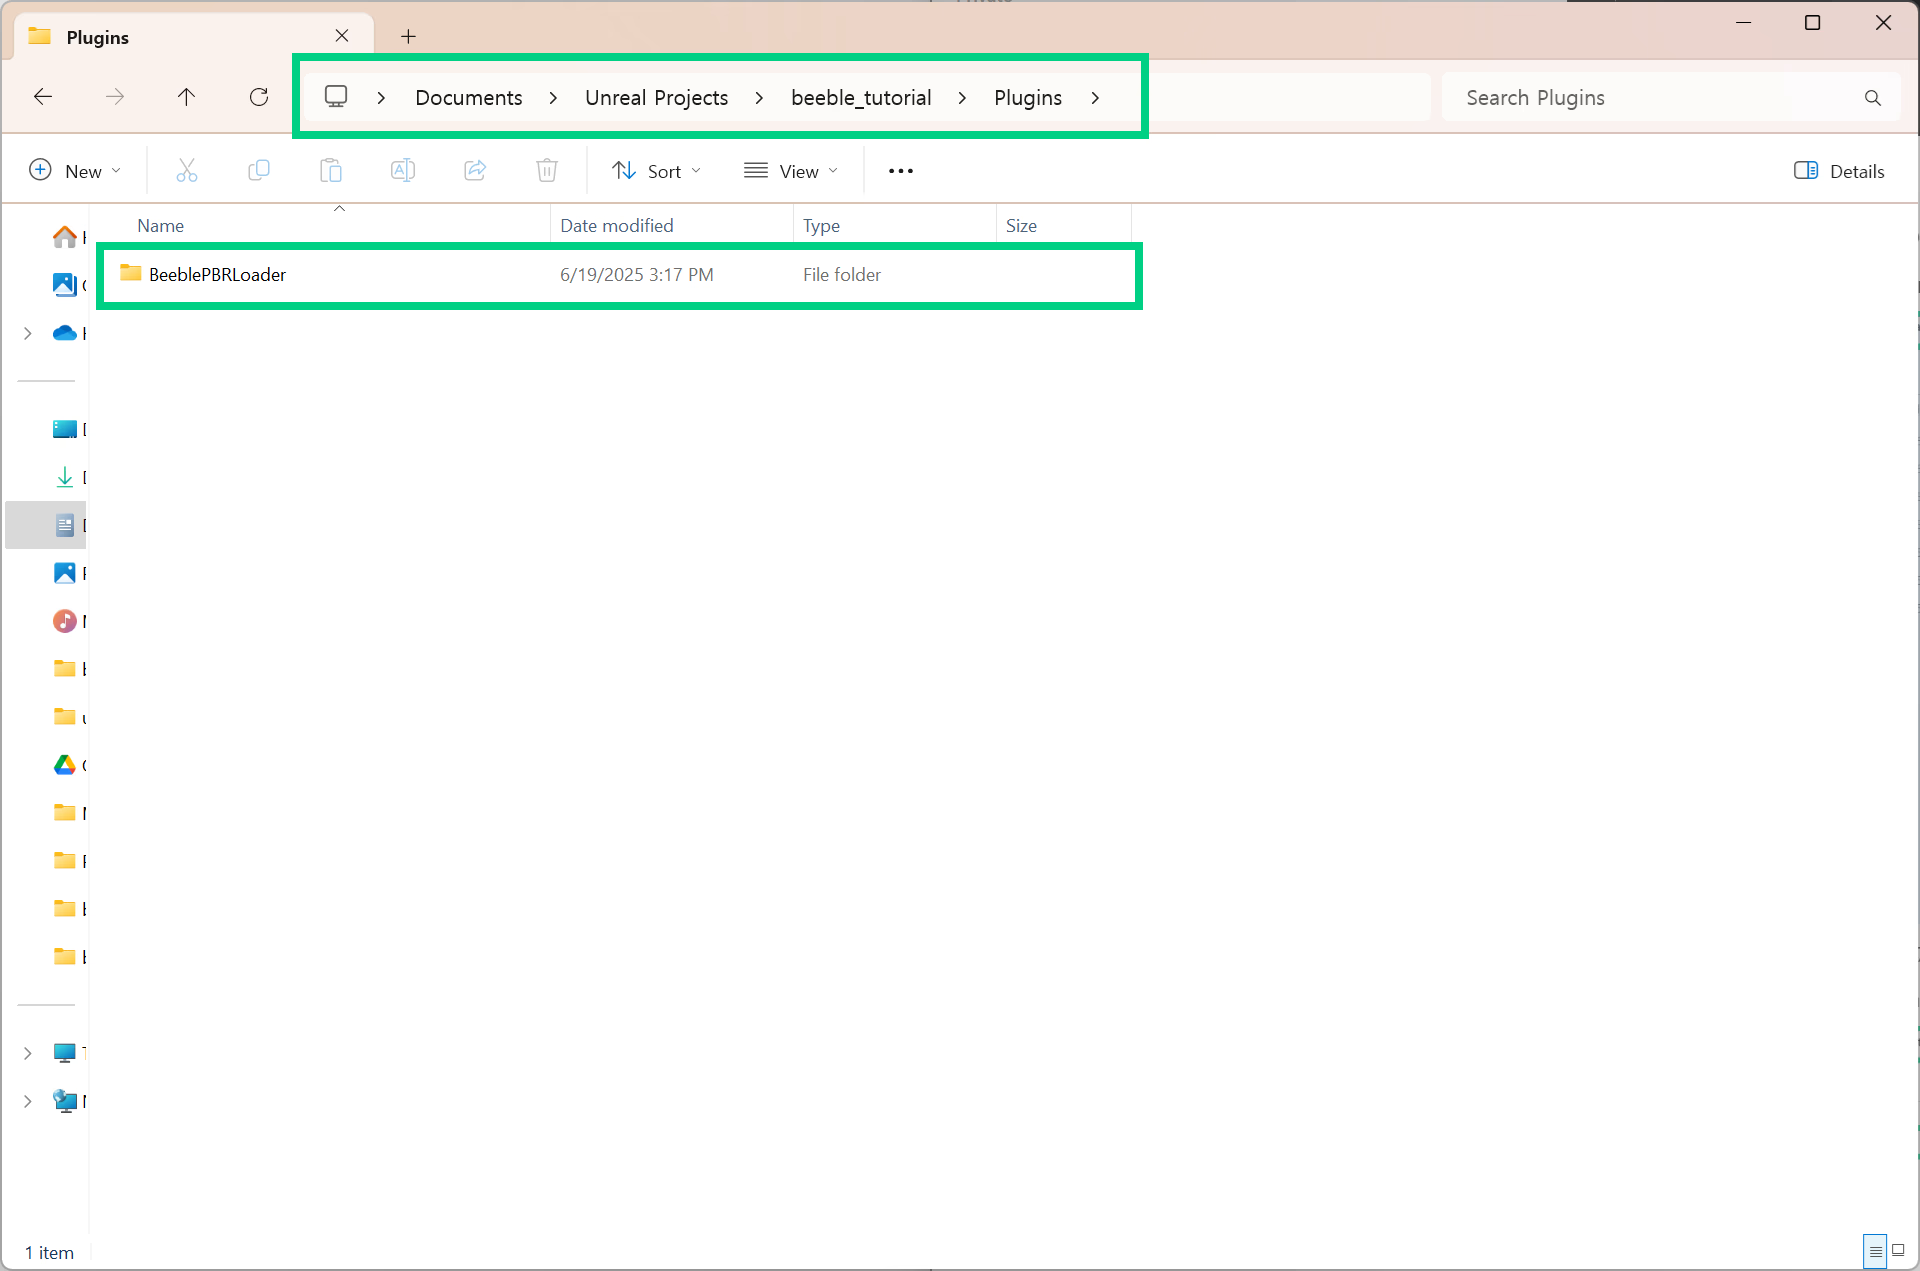
2. Navigate into `Plugins` folder. (*If the Plugins folder doesn't exist, create one*)
3. Copy the unzipped plugin folder, `BeeblePBRLoader`, into the `Plugins` directory.
#### 1.5 Activate Beeble plugin
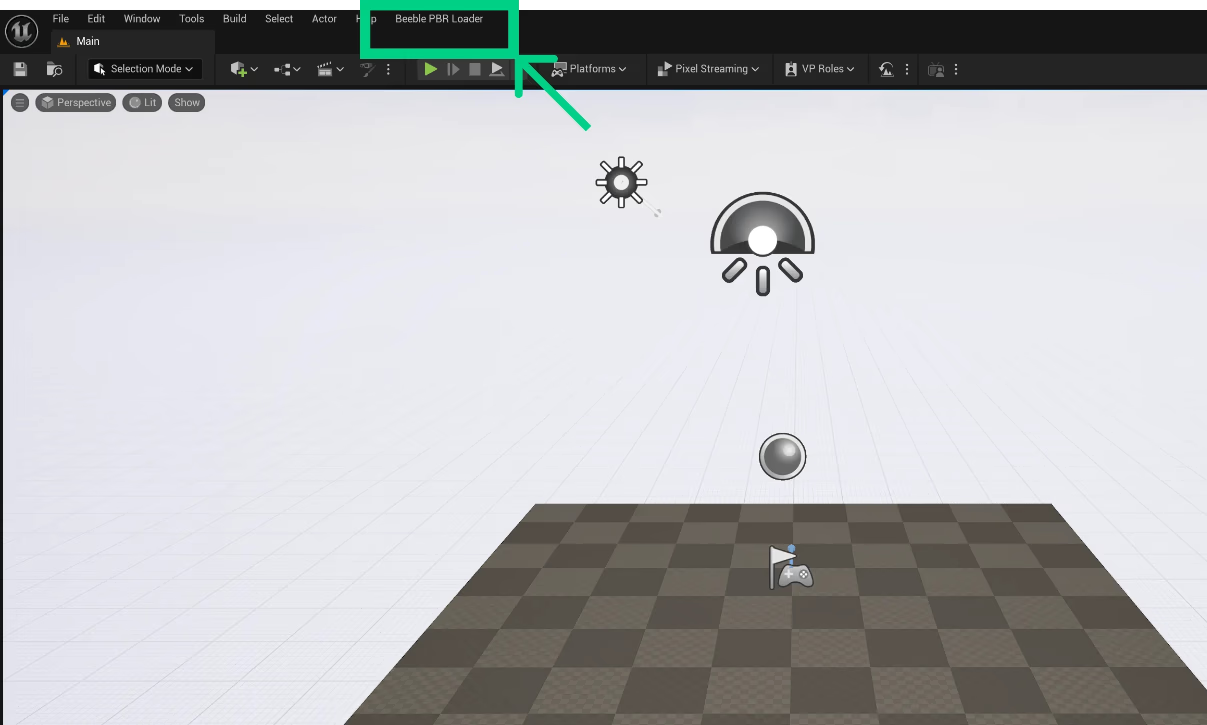
1. Restart your project.
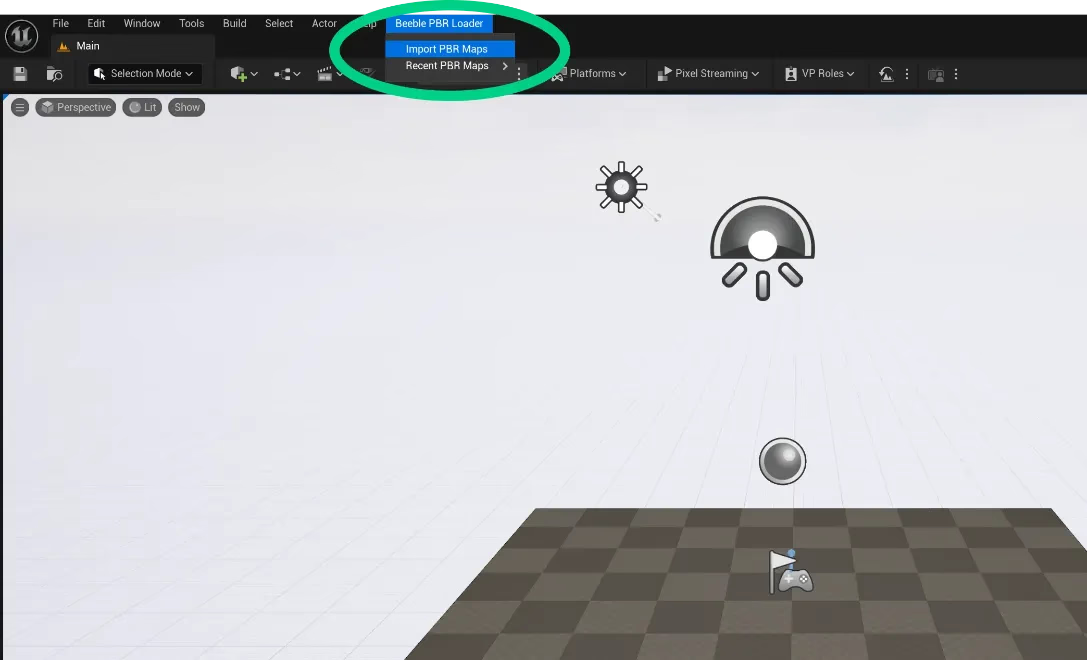
2. Upon restart, the plugin will initialize automatically, and you should see `Beeble PBR Loader` appear in the top menu.
### 2. Recommended Setup
#### 2.1 High Quality Translucency Reflections
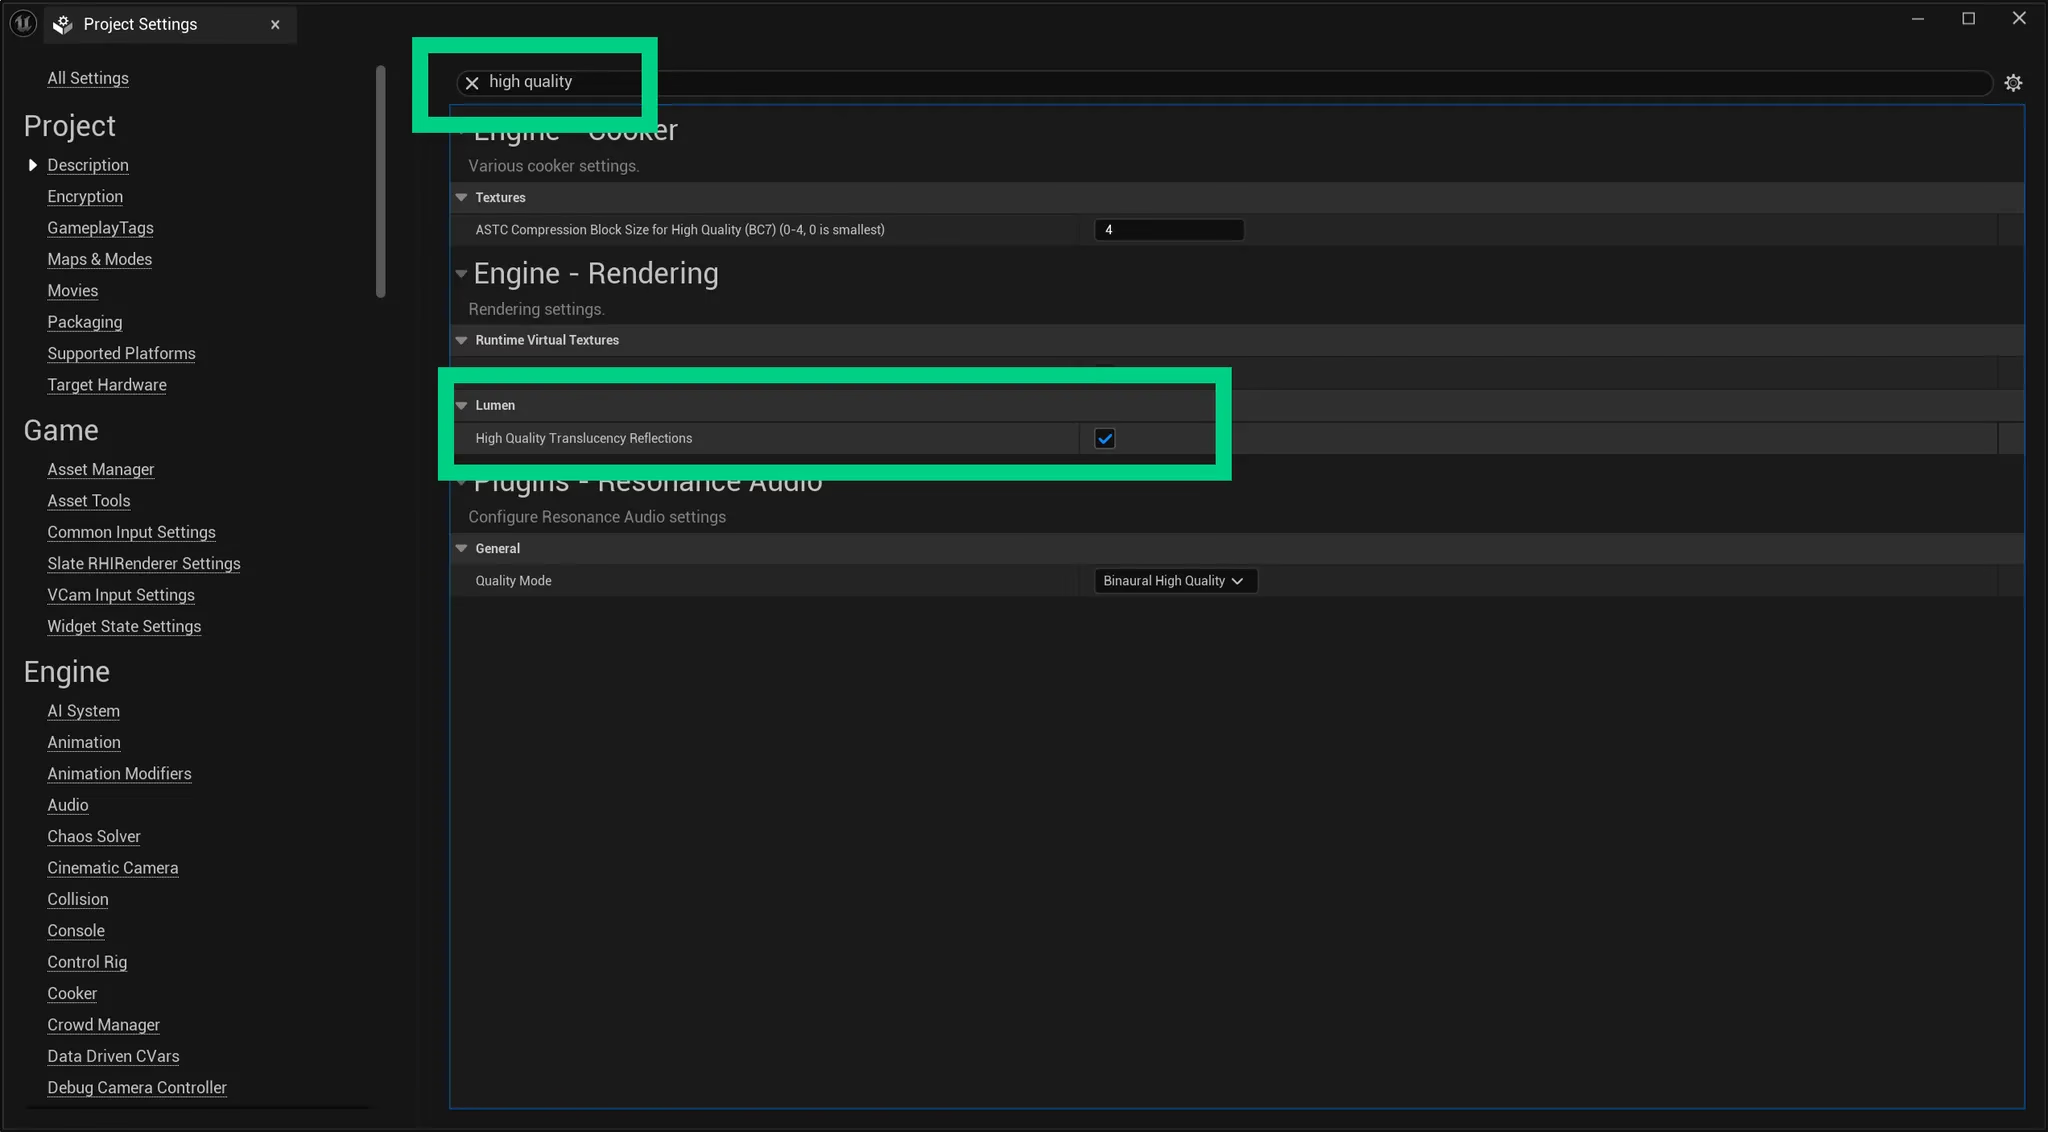
1. Navigate to `Edit` > `Project Settings`. Find `High Quality Translucency Reflections` and make sure to enable this feature to minimize artifacts in the viewport.
#### 2.2 Use Lumen for Reflections & Global Illumination
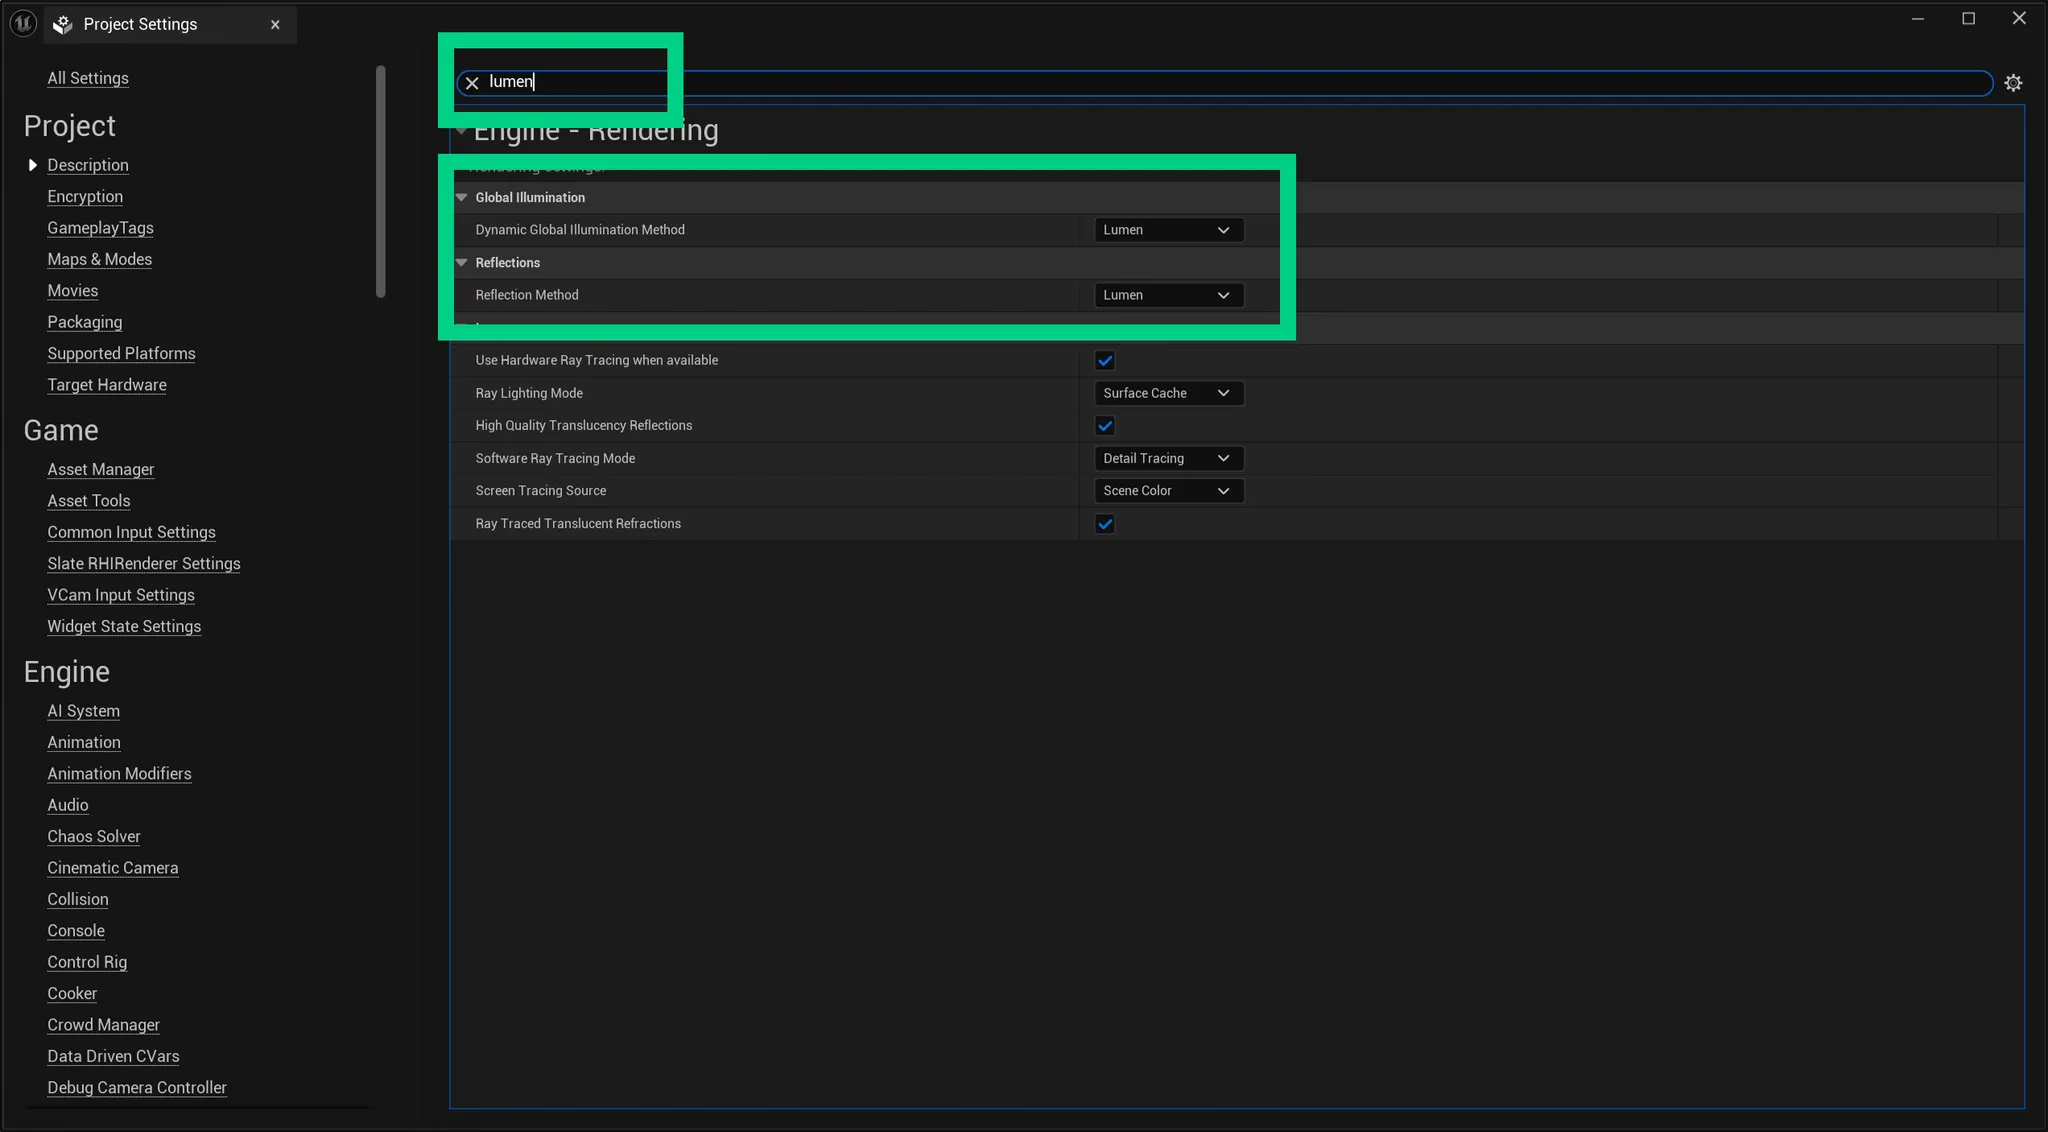
1. Navigate to `Edit` > `Project Settings`. Find `Reflections` & `Global Illuminations`. Ensure that `Lumen` is selected for both of these features.
#### 2.3 Support Hardware Raytracing
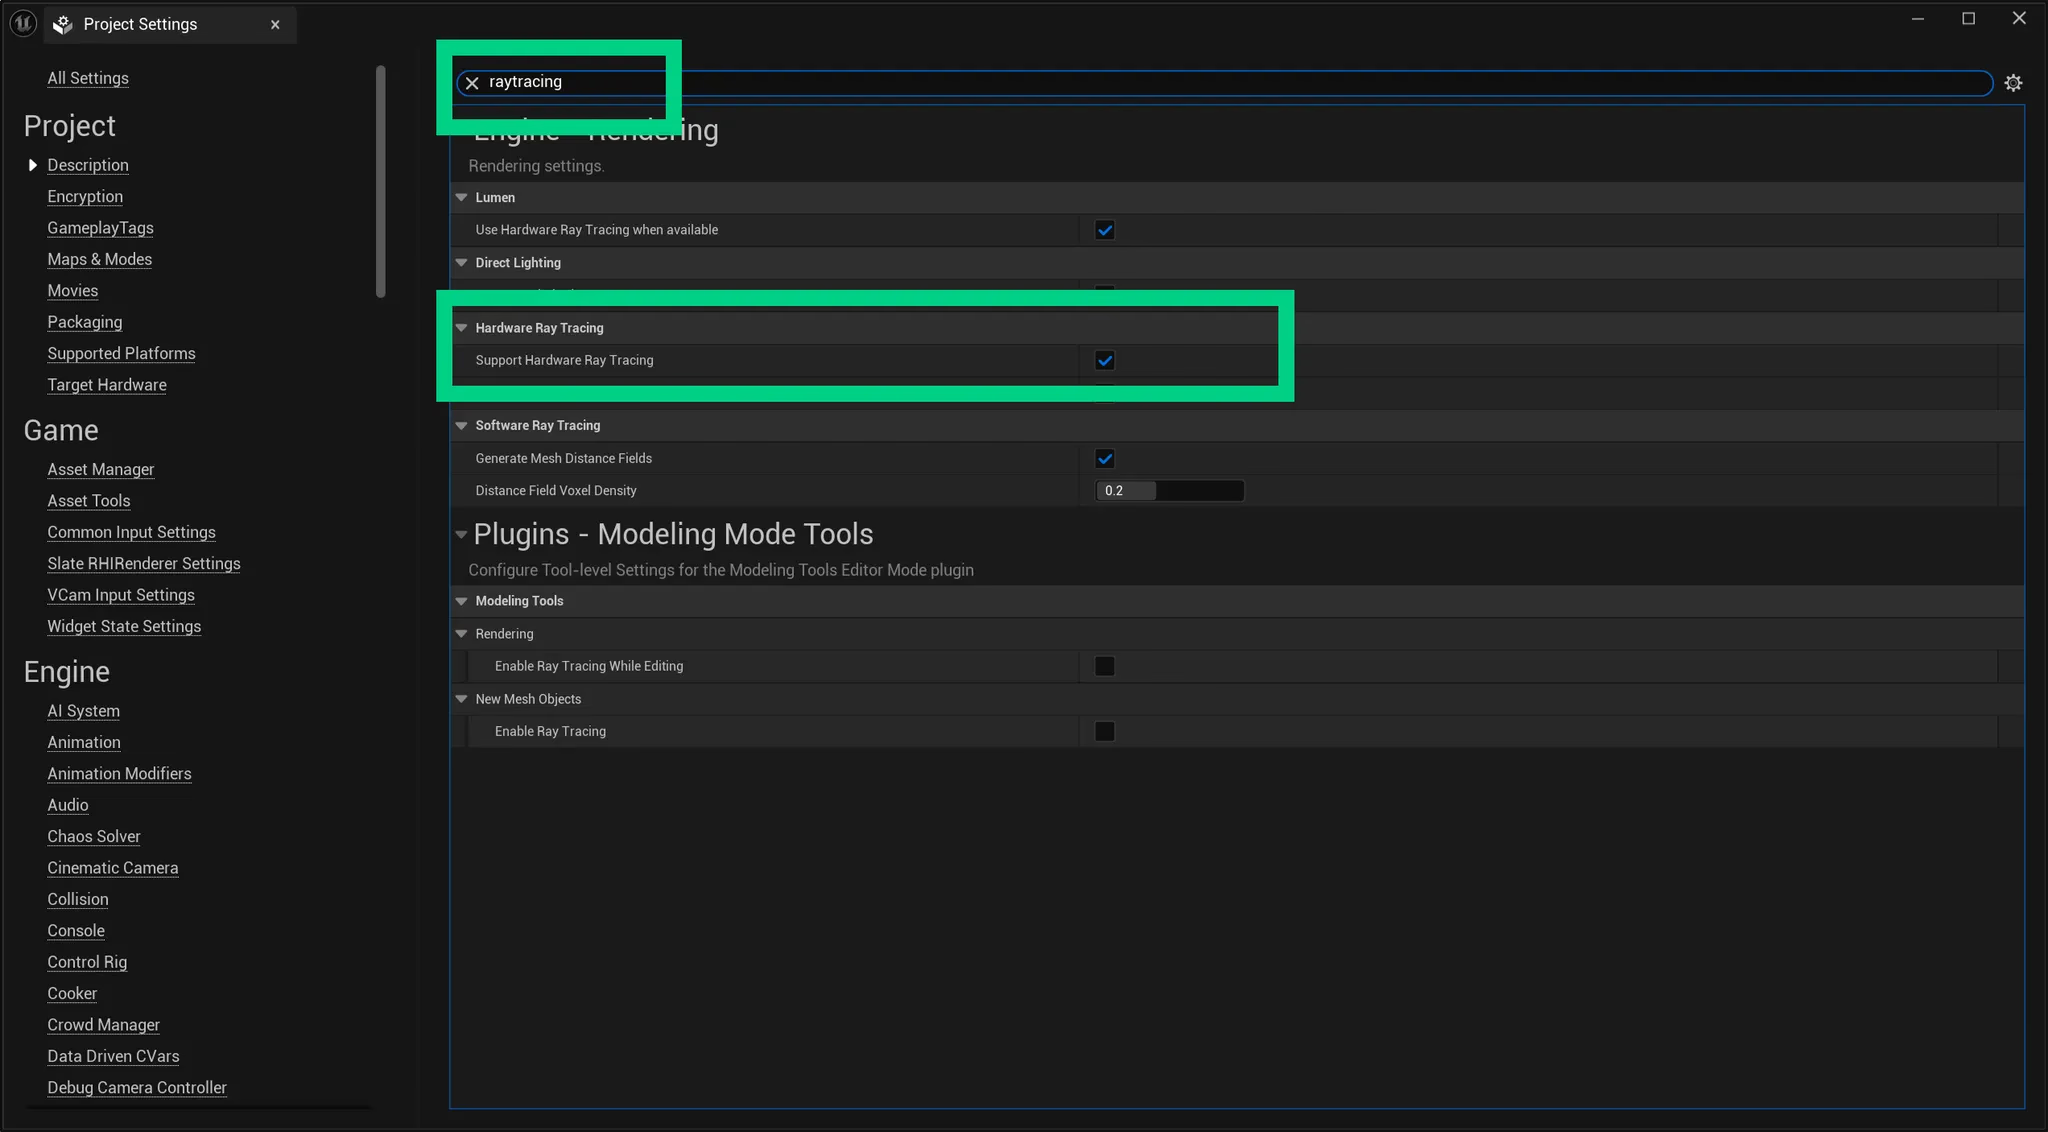
1. Navigate to `Edit` > `Project Settings`. Find `Support Hardware Raytracing`. and make sure to enable this feature.
#### 2.4 Increase Cache for smooth playback
1. Navigate to `Edit` > `Project Settings` > `Plugins` > `Img Media`
### 3. Usage
#### 3.1 Load PBR maps using the script
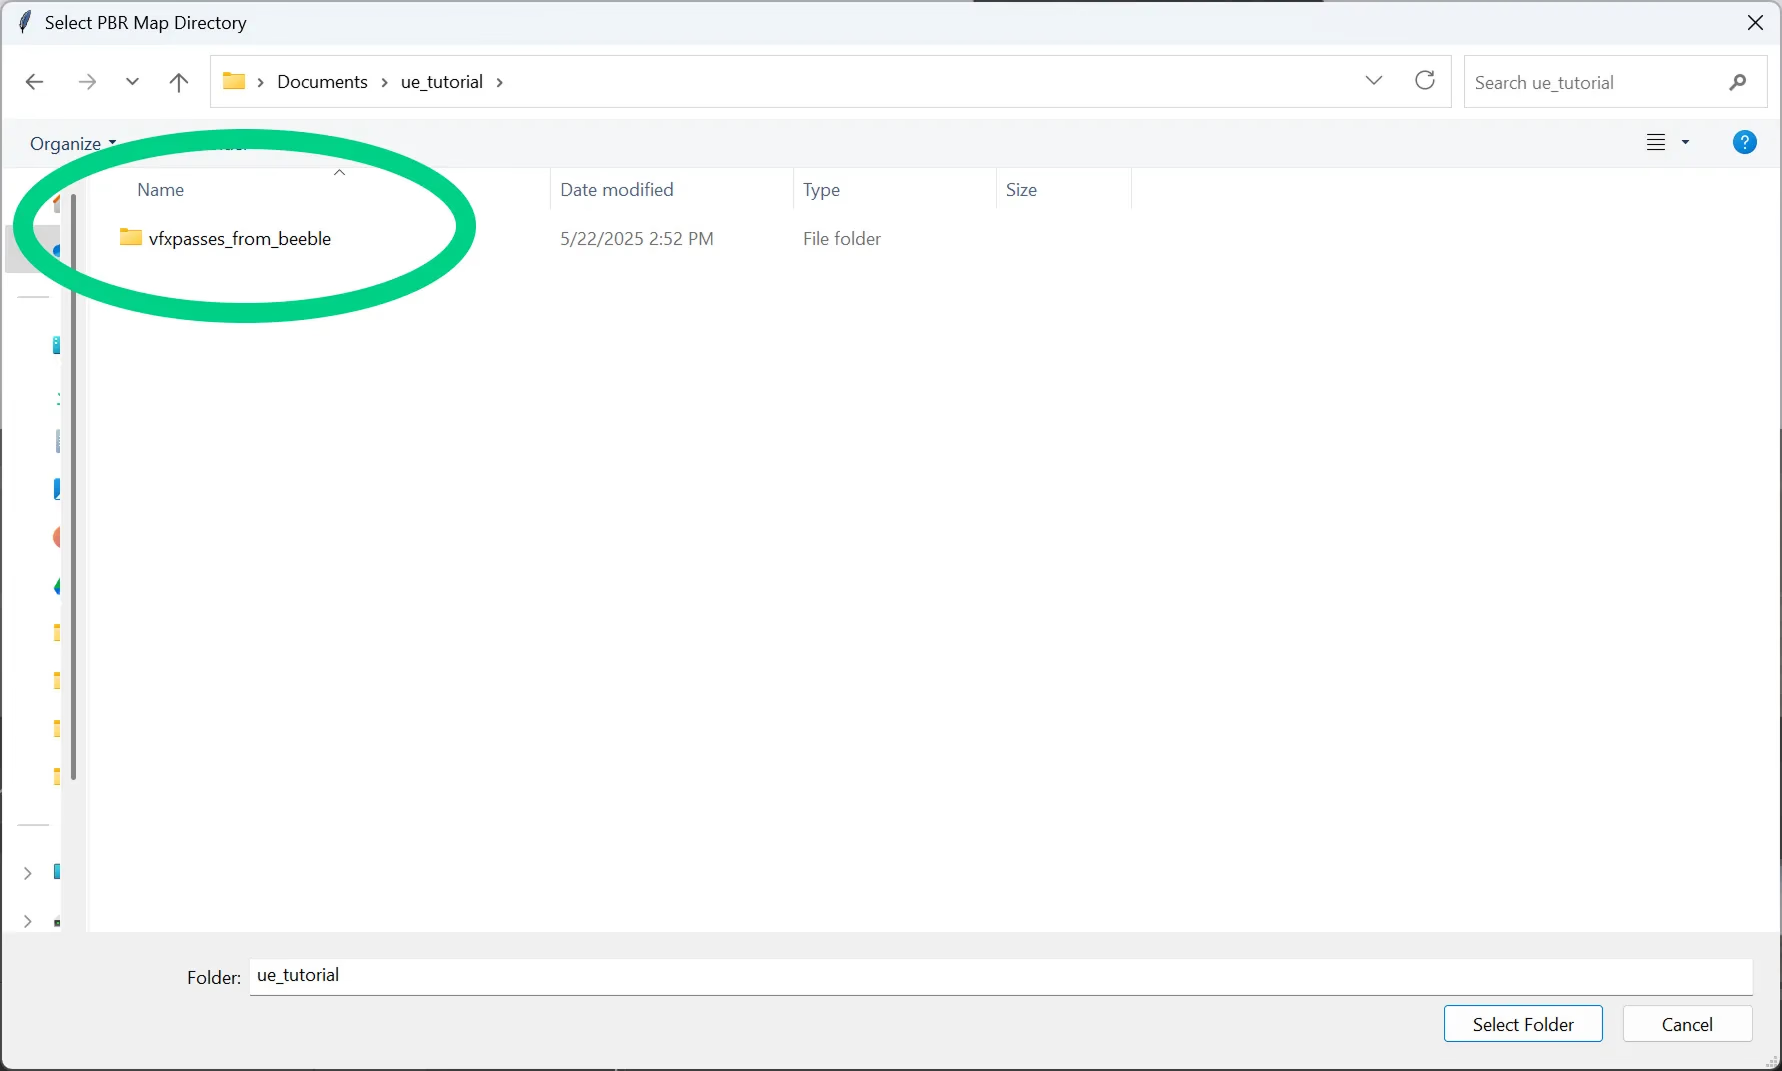
1. Navigate to `Beeble PBR Loader` > `Import PBR Maps` to select the VFX Pass directory.
2. Select the unzipped VFX Pass directory. IMPORTANT: DO NOT select one of the VFX Pass directory inside.
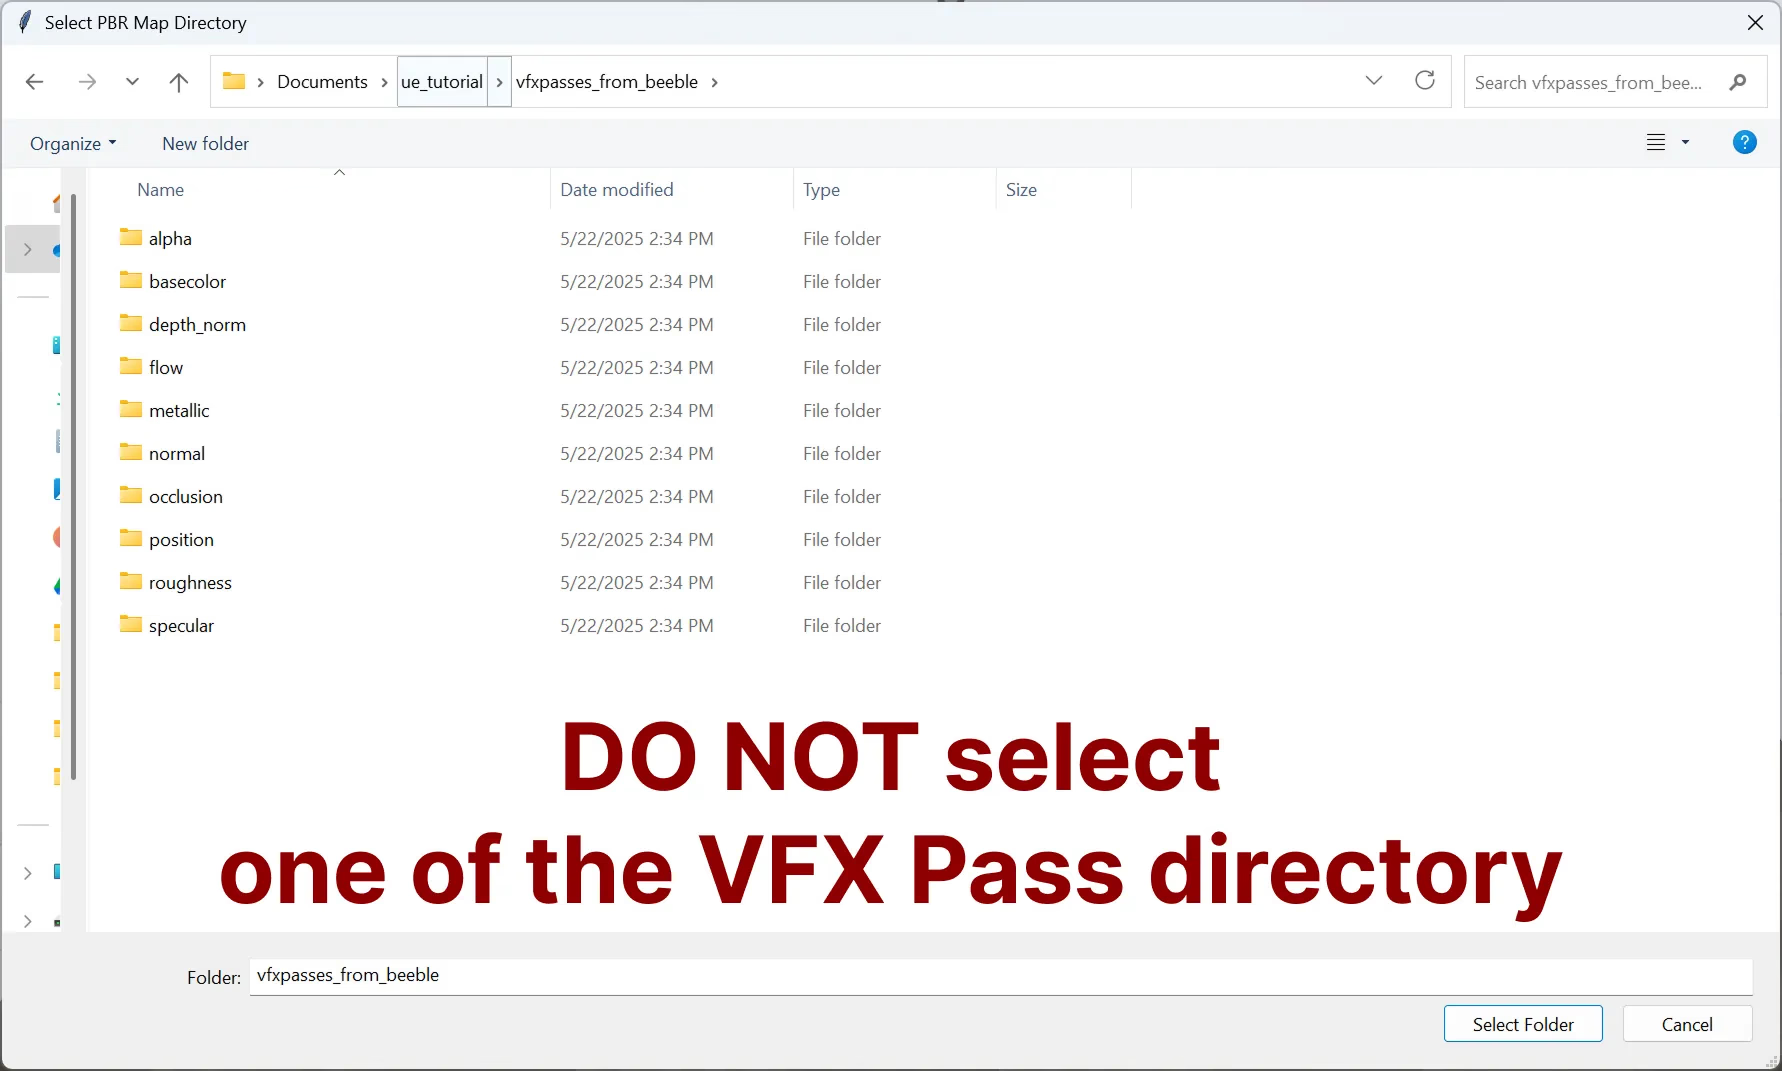
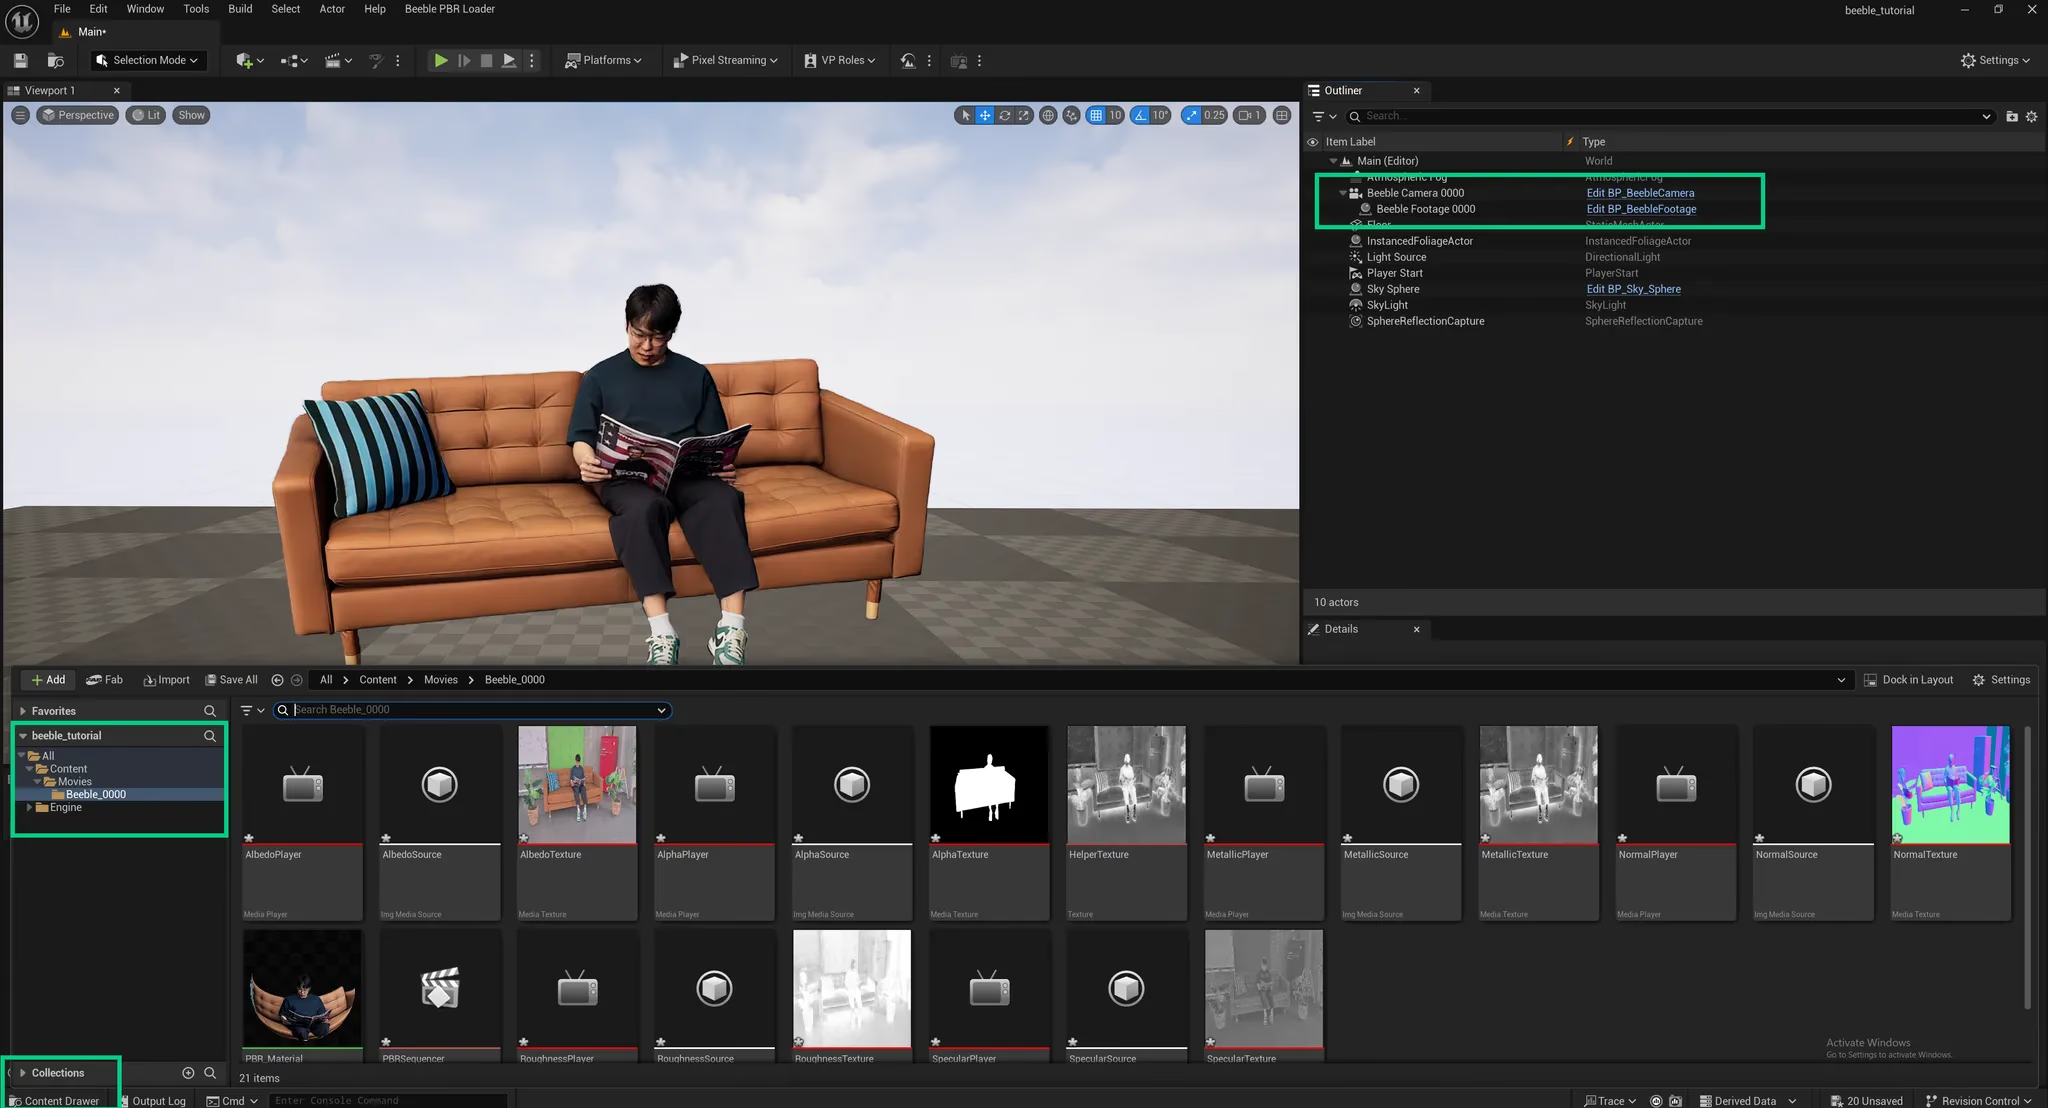
3. After successfully loading the VFX Pass directory, two actors will be visible in the outliner: `Beeble Camera` and `Beeble Footage`. Also, upon opening `Content Drawer` (located at bottom), a `Beeble_0000` folder along with its associated assets will be automatically created.
4. To view and edit the preview of rendered image sequences, select `PBRSequencer`.
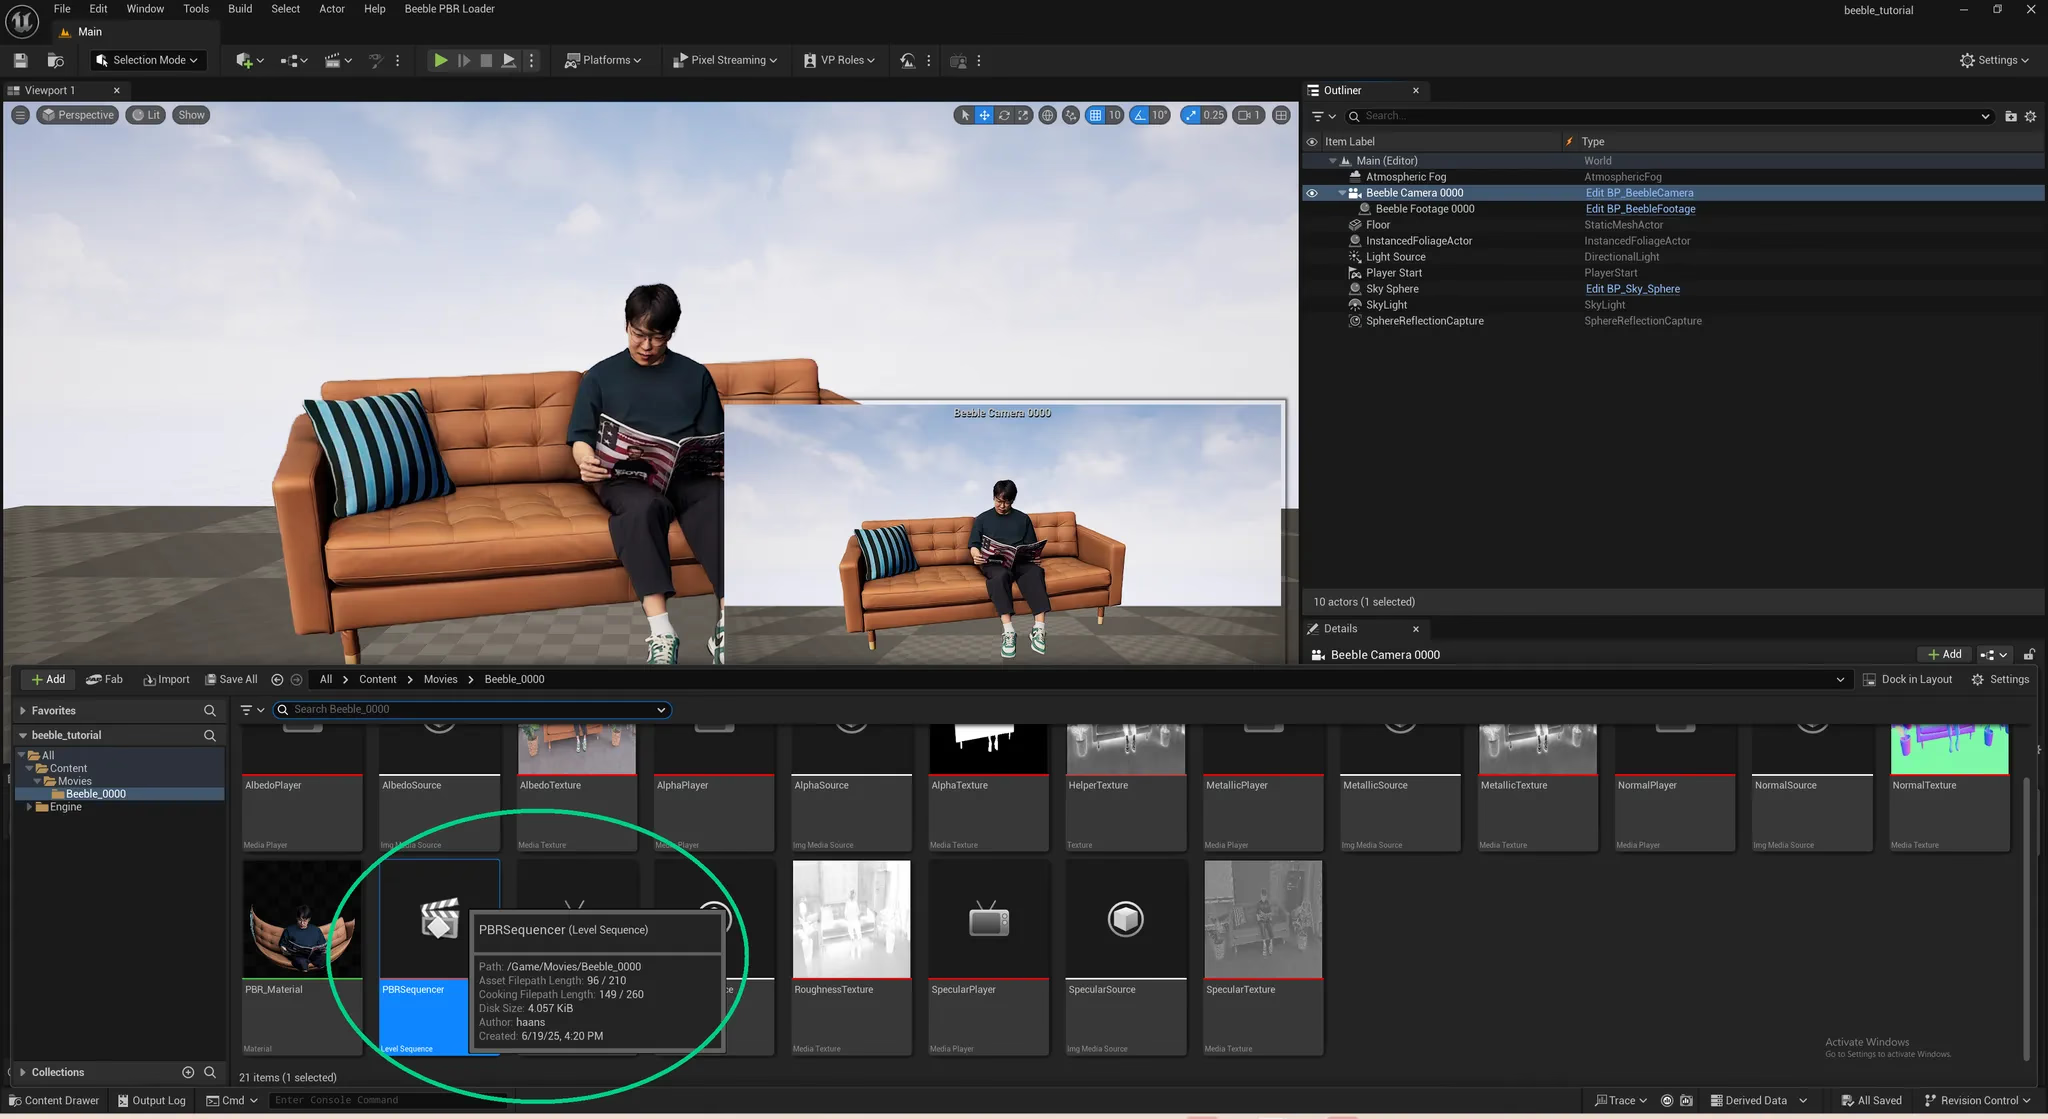
5. In Sequencer panel, you can find VFX Passes are added together with Camera Cut and Beeble Camera. To view the scene from the perspective of the Beeble Camera, simply click the `Perspective` button.
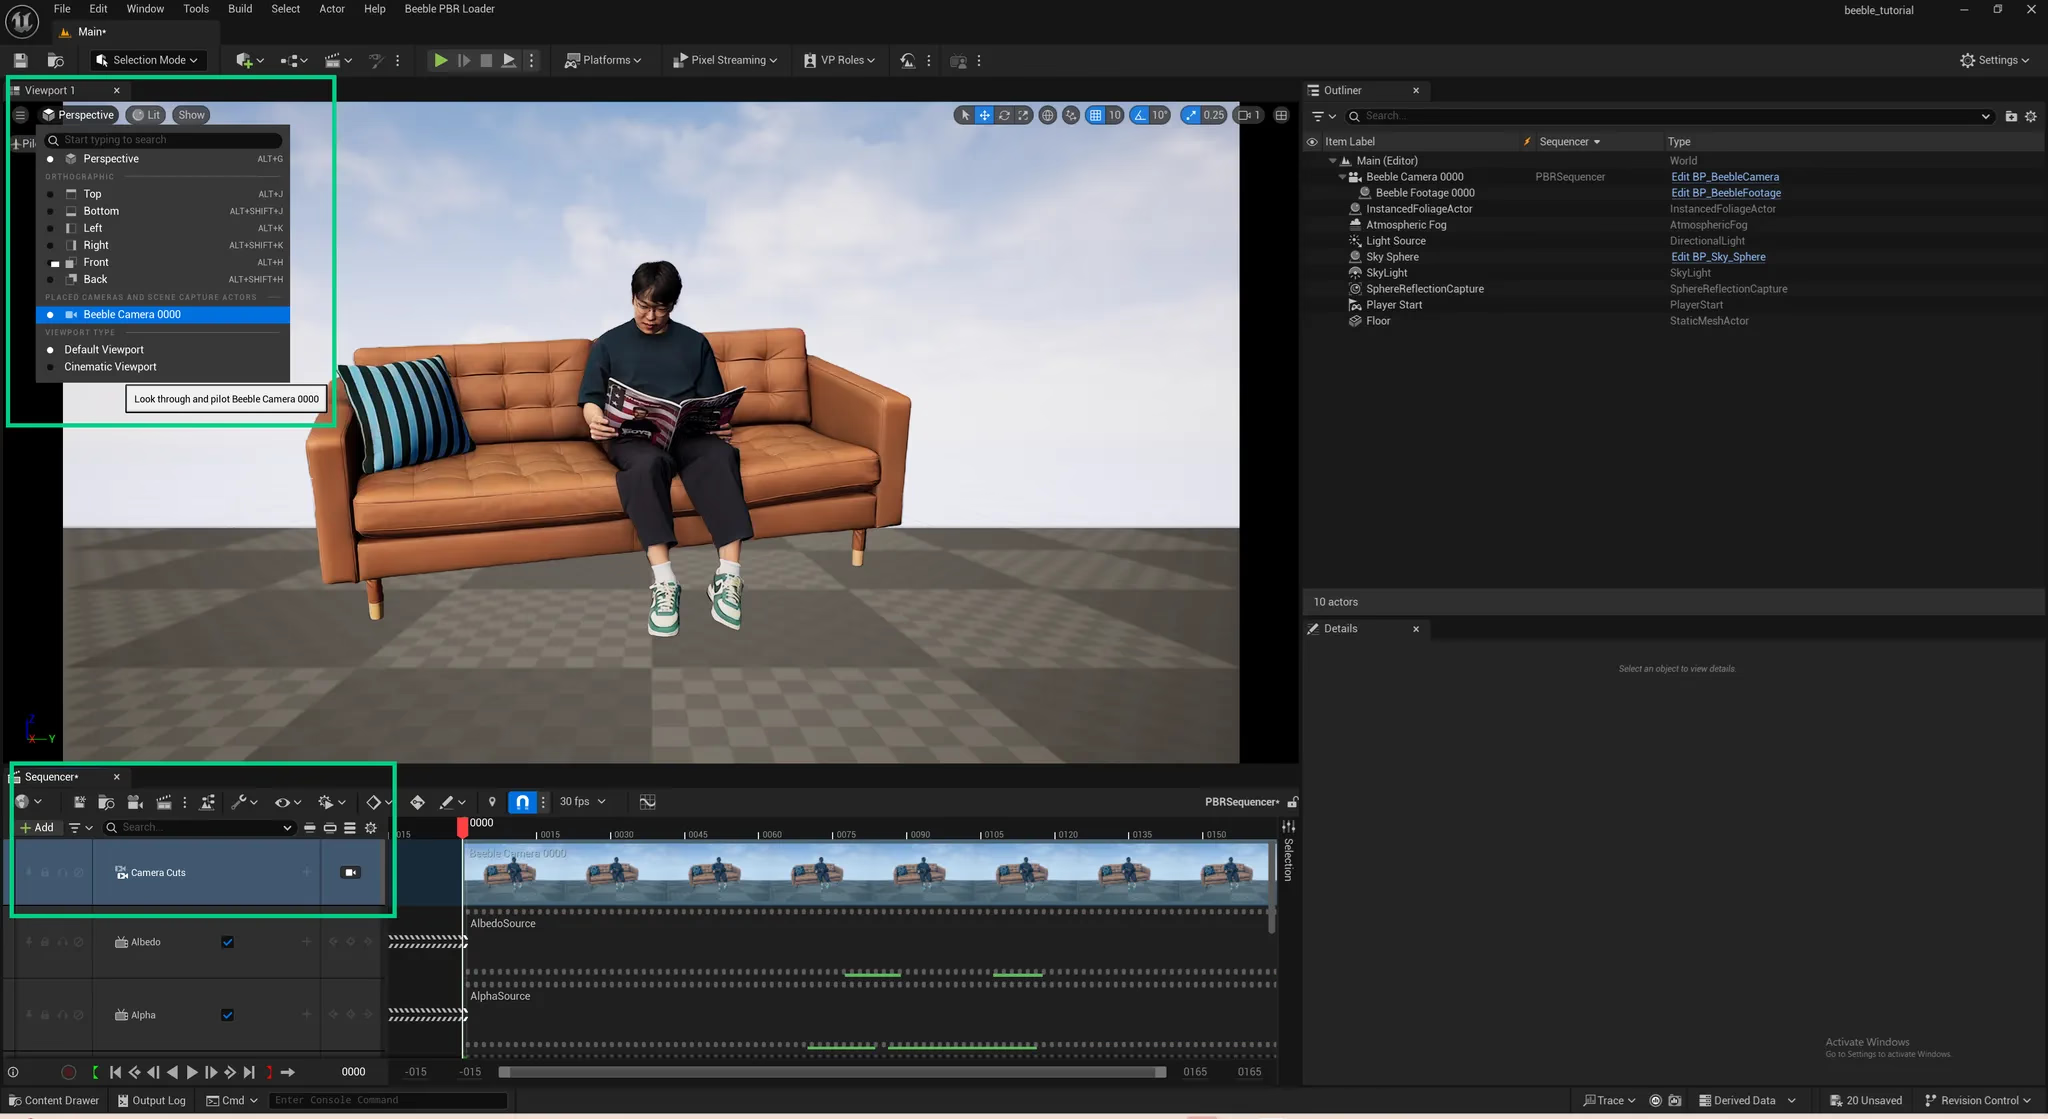
6. If you want to learn about the Beeble material node graphs, simply click on `PBRMaterial` in `Content Drawer`.
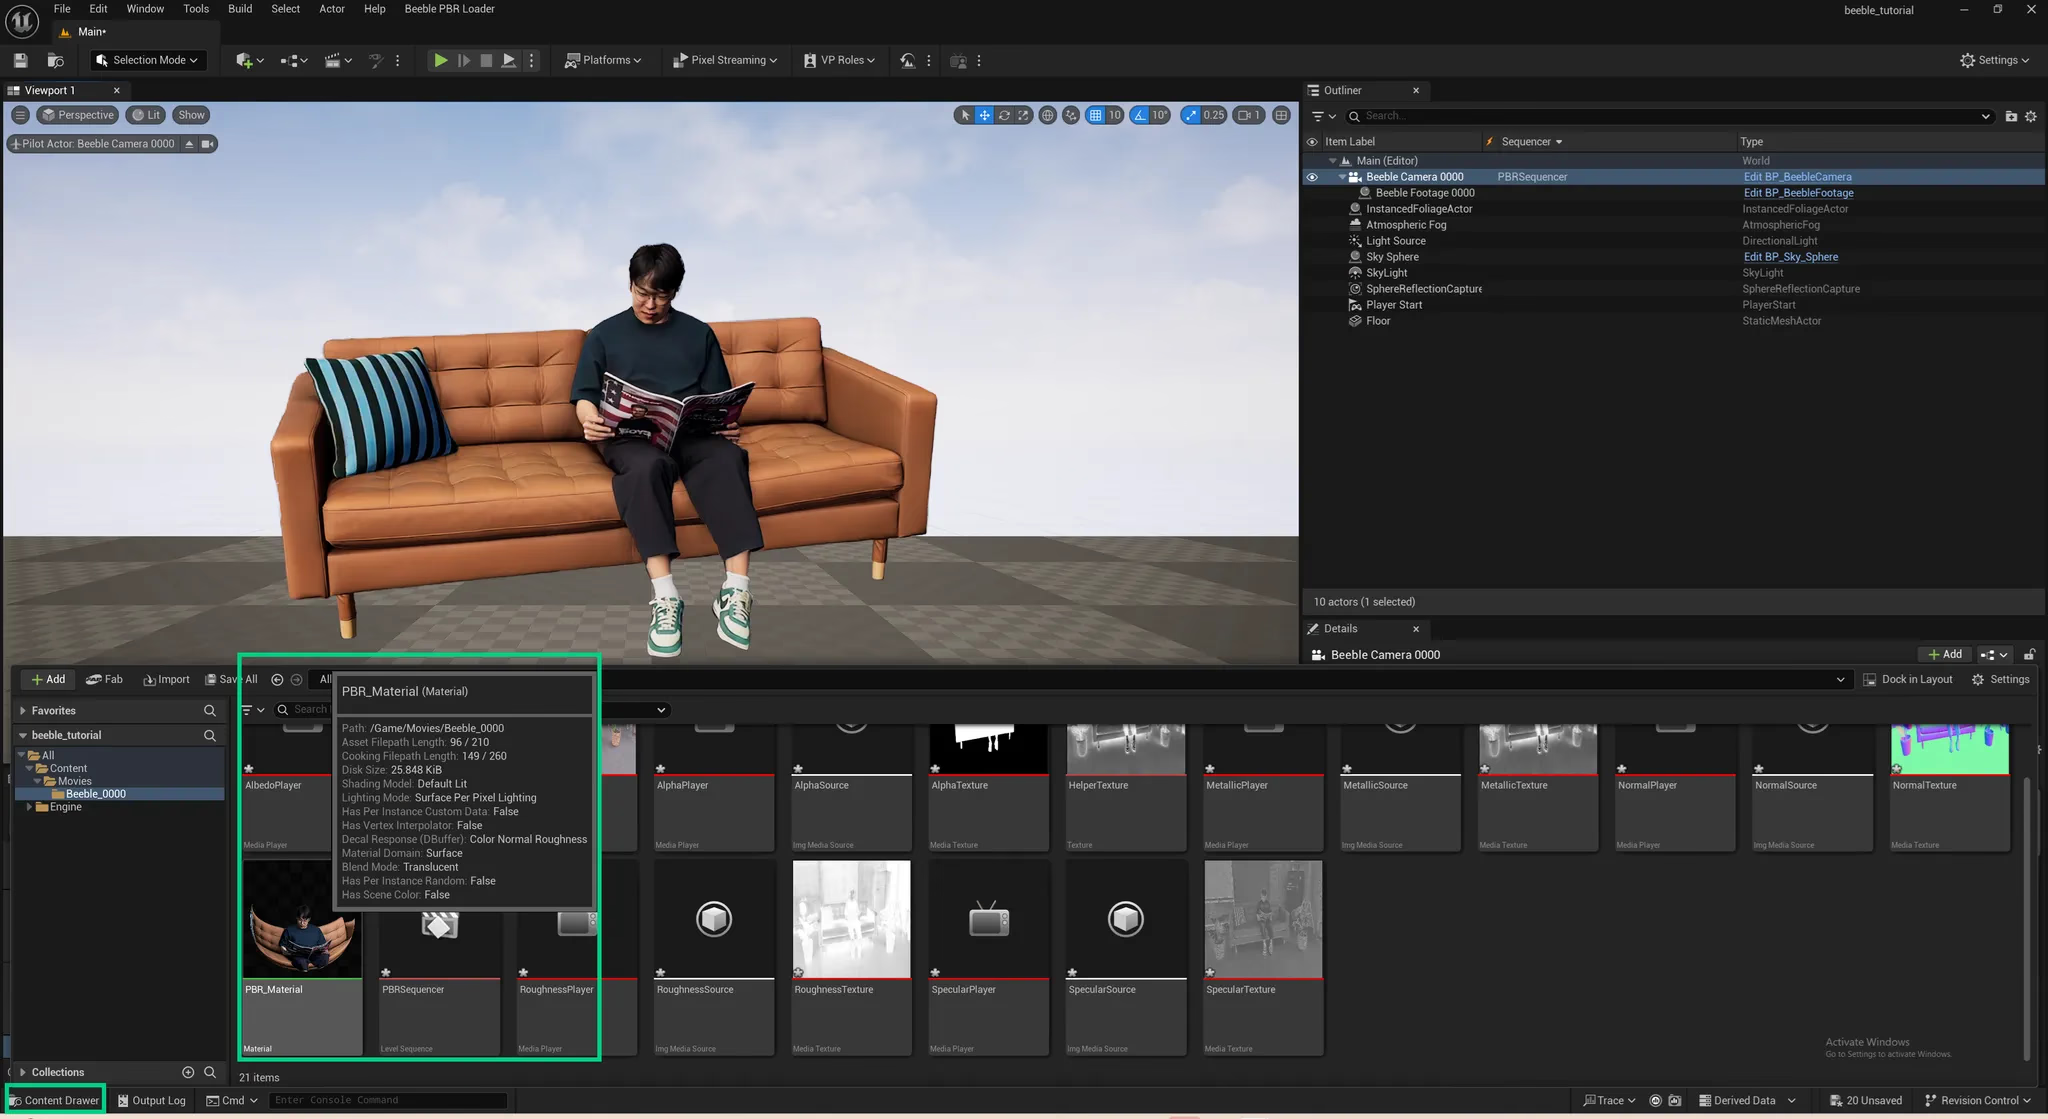
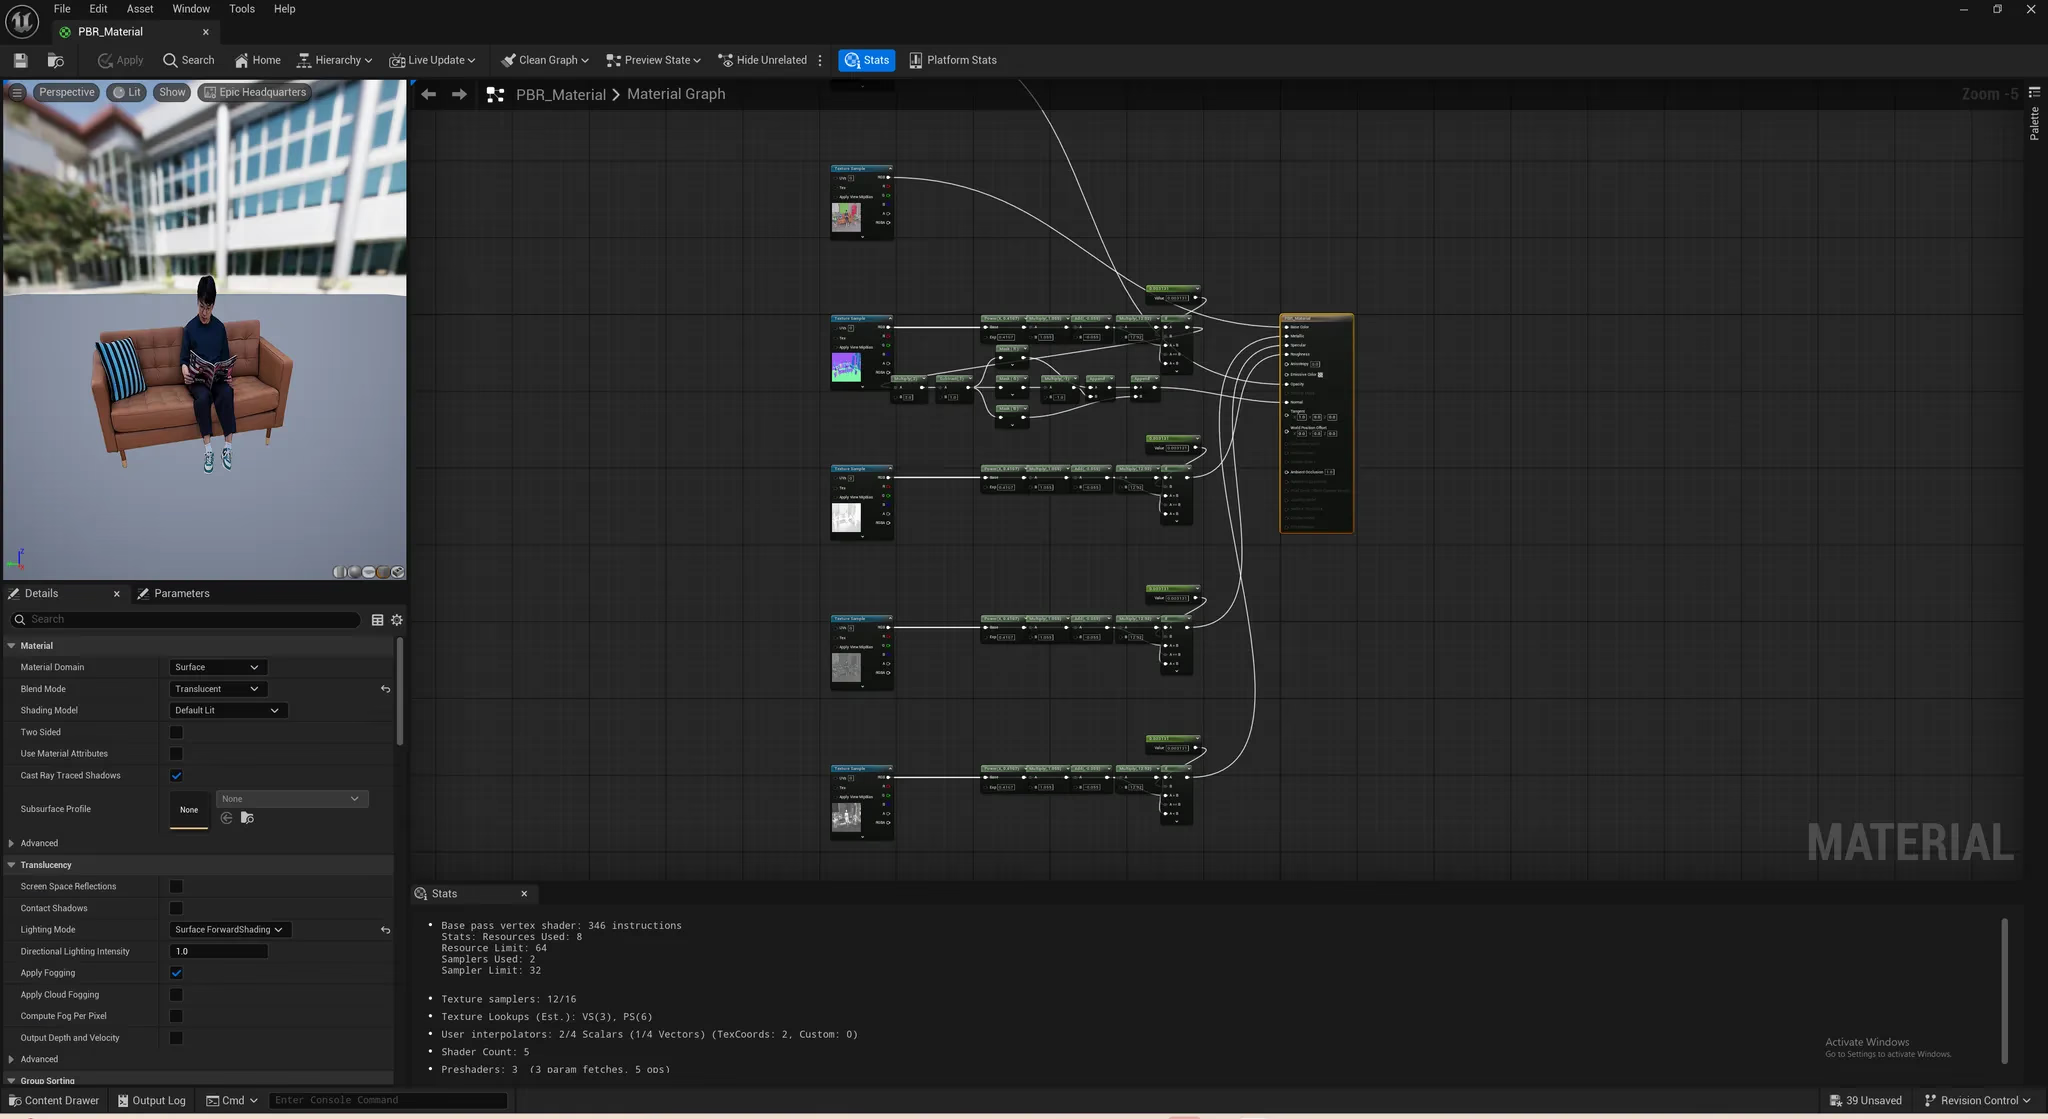
7. This node graph connects PBR textures to the BSDF material, performing color space conversion (when required) and processing of normal maps, to ensure the precise rendering output.
#### 3.2 Render using Movie Render Queue
1. Make sure that the movie render queue plugin is enabled.
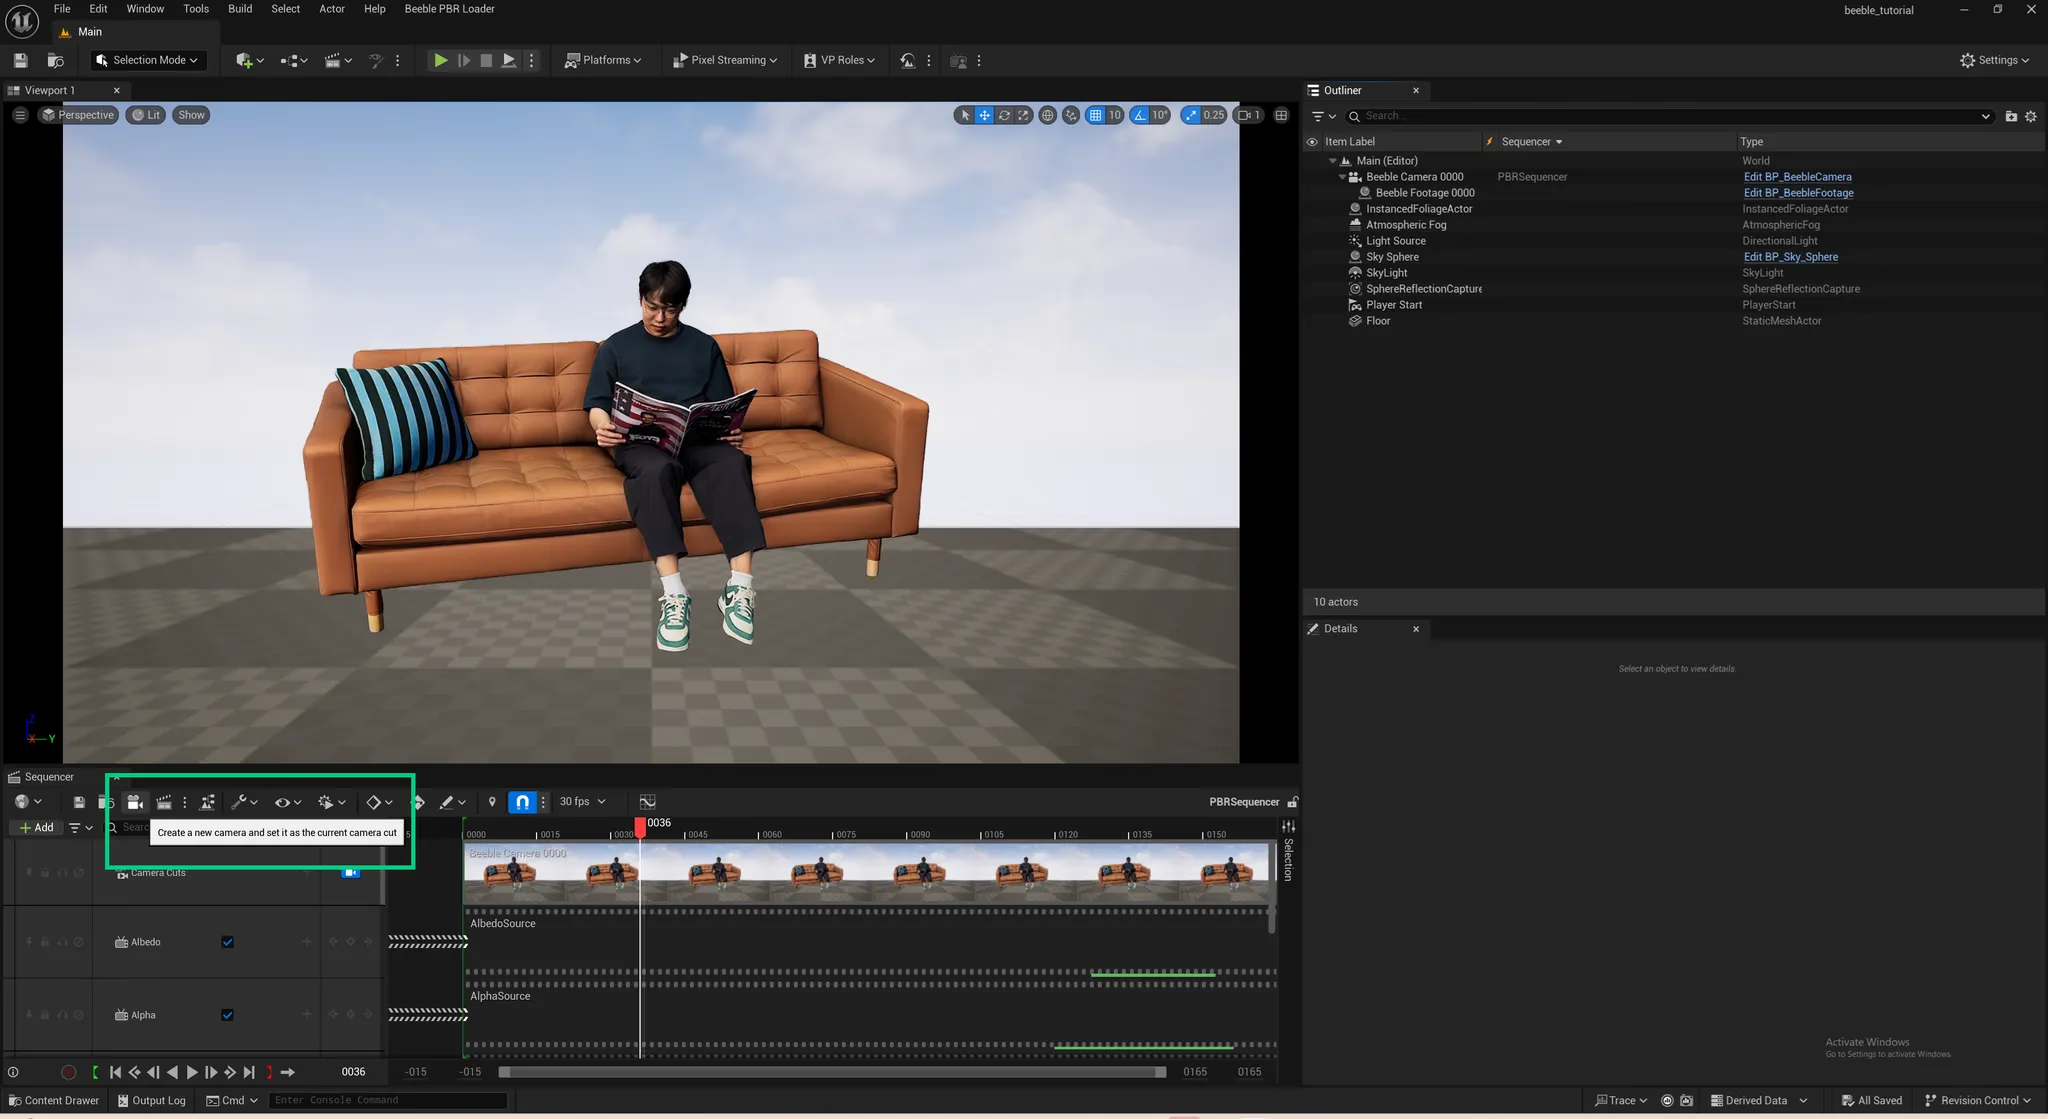
2. Open the sequencer again by clicking `PBRSequencer` in the `Content Browser` and then click on the button shown in the image below.
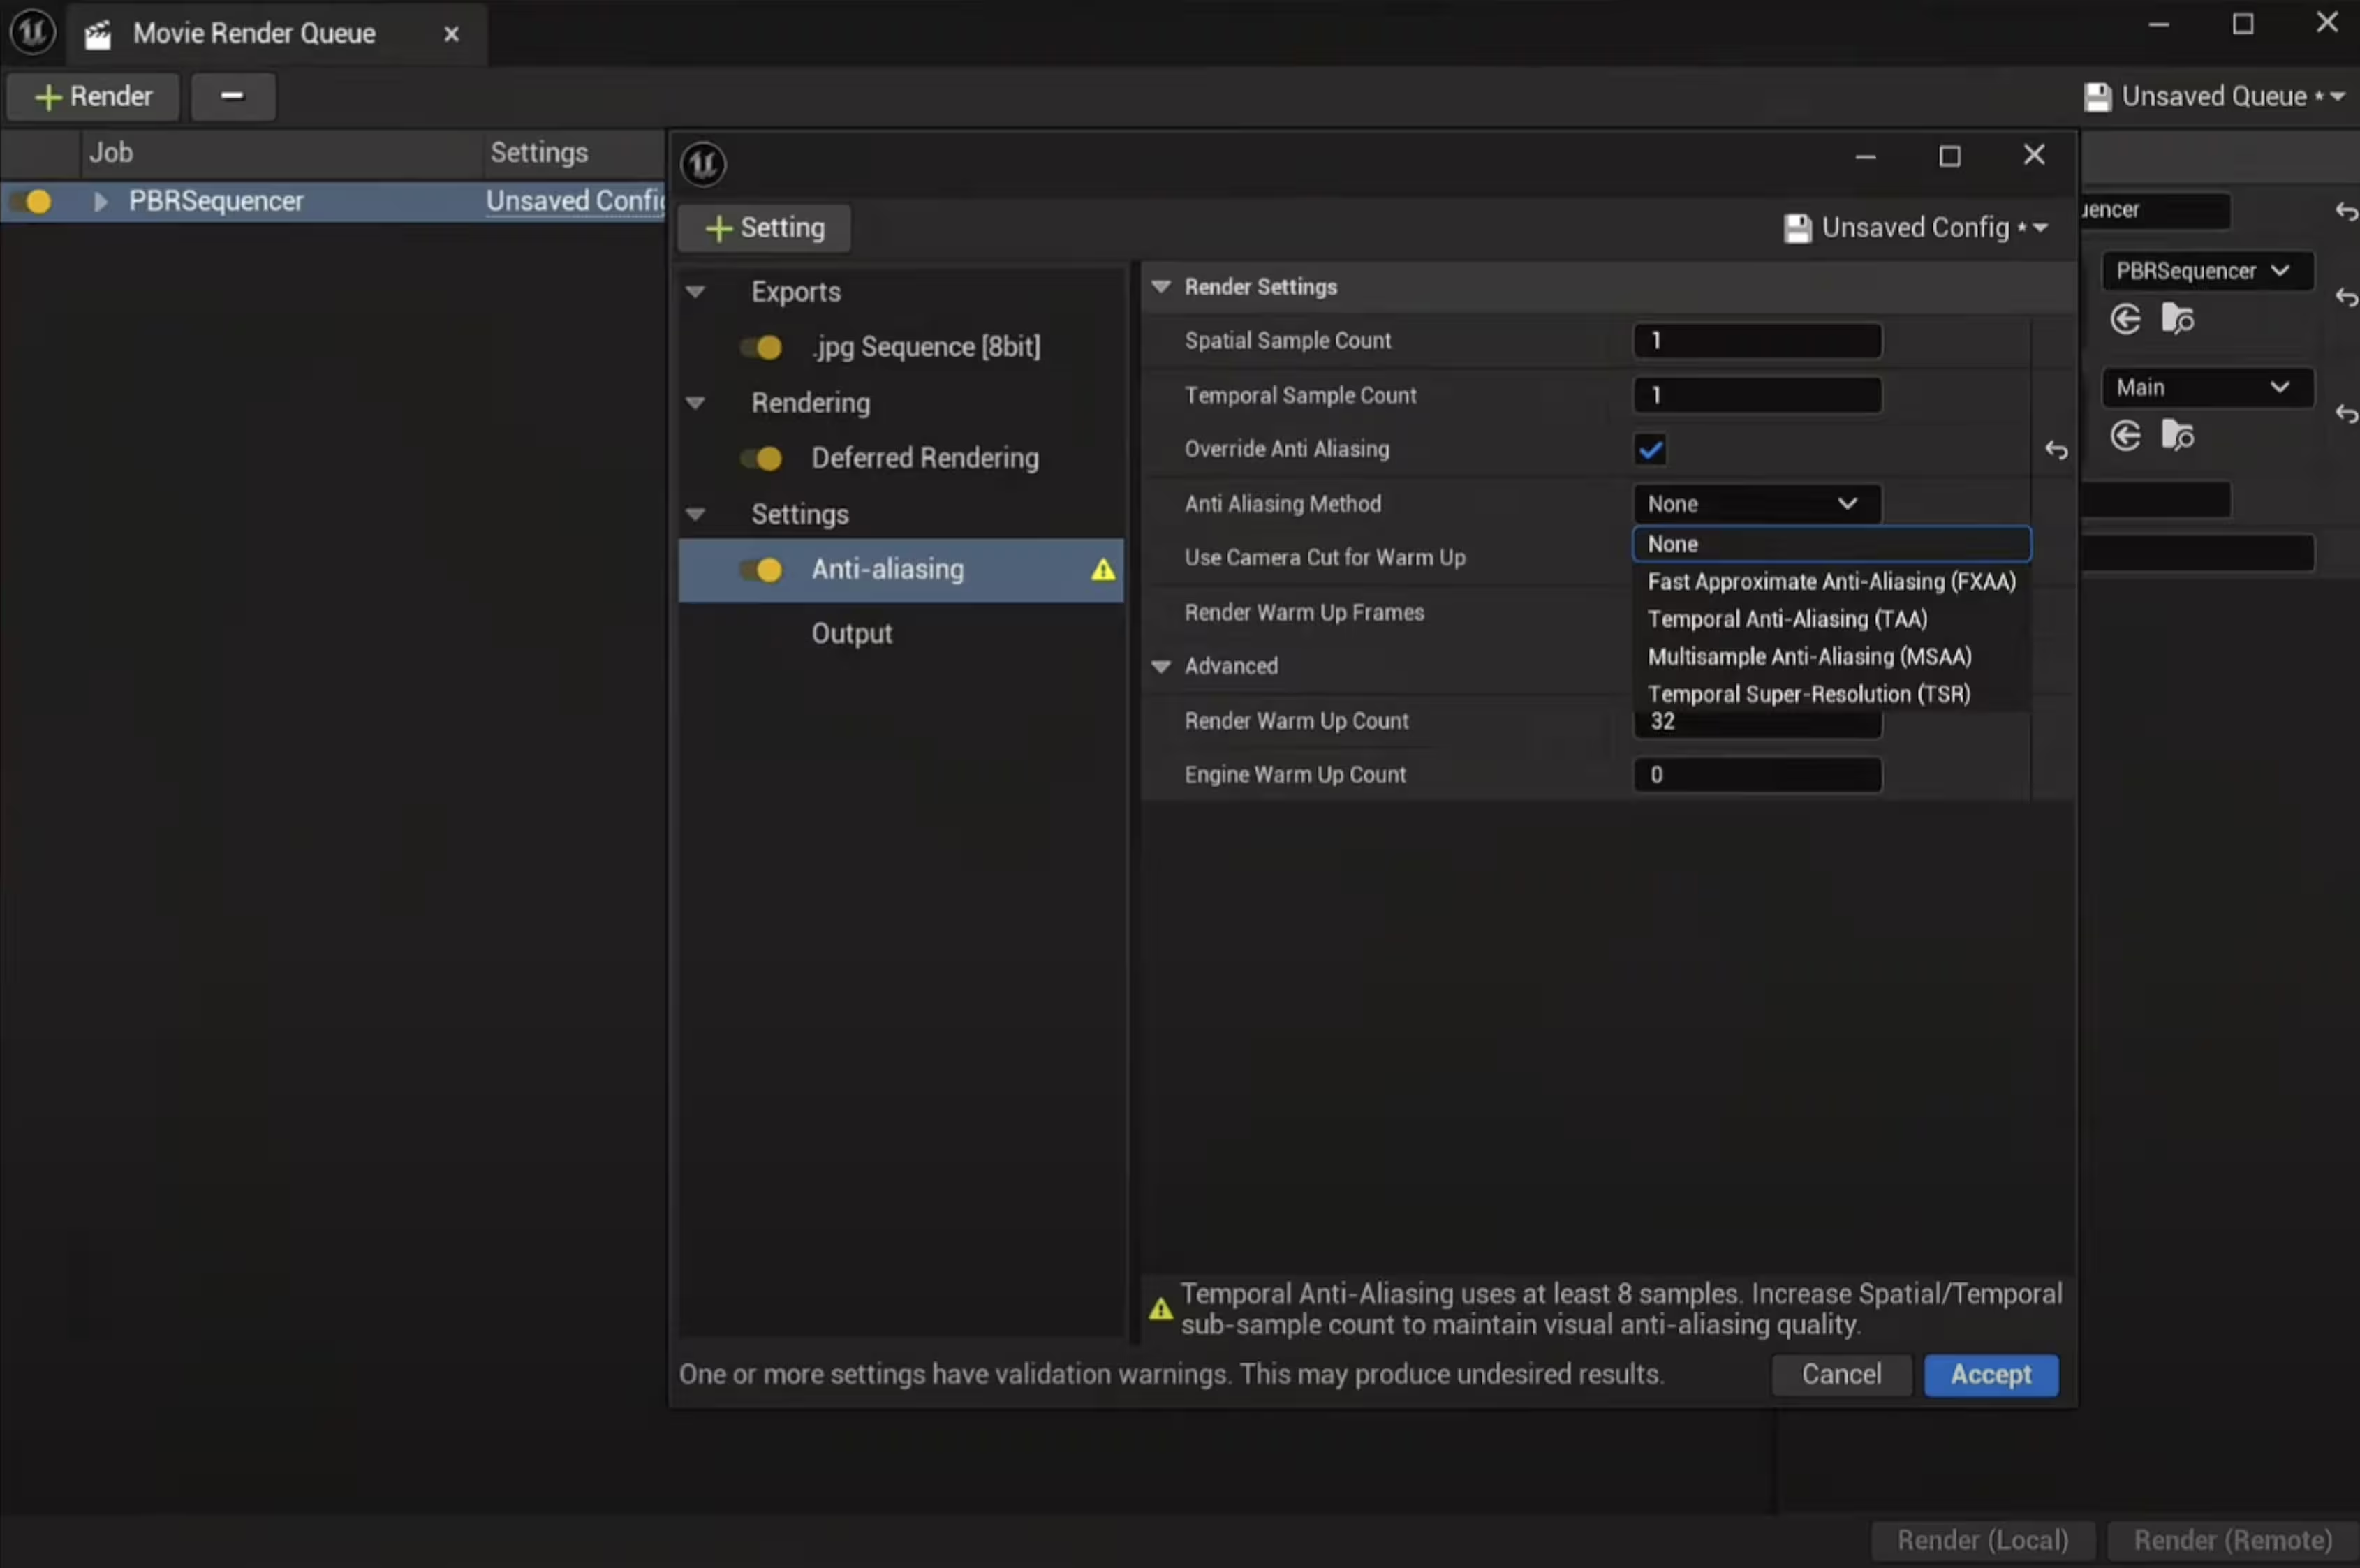
3. Open the settings configuration. Add **Anti-aliasing** to the settings list. Enable **Override Anti Aliasing** and select either **None**, **FXAA**, or **MSAA**. These options are recommended because temporal methods like TSR and TAA blend data from previous frames, which can cause ghosting artifacts.
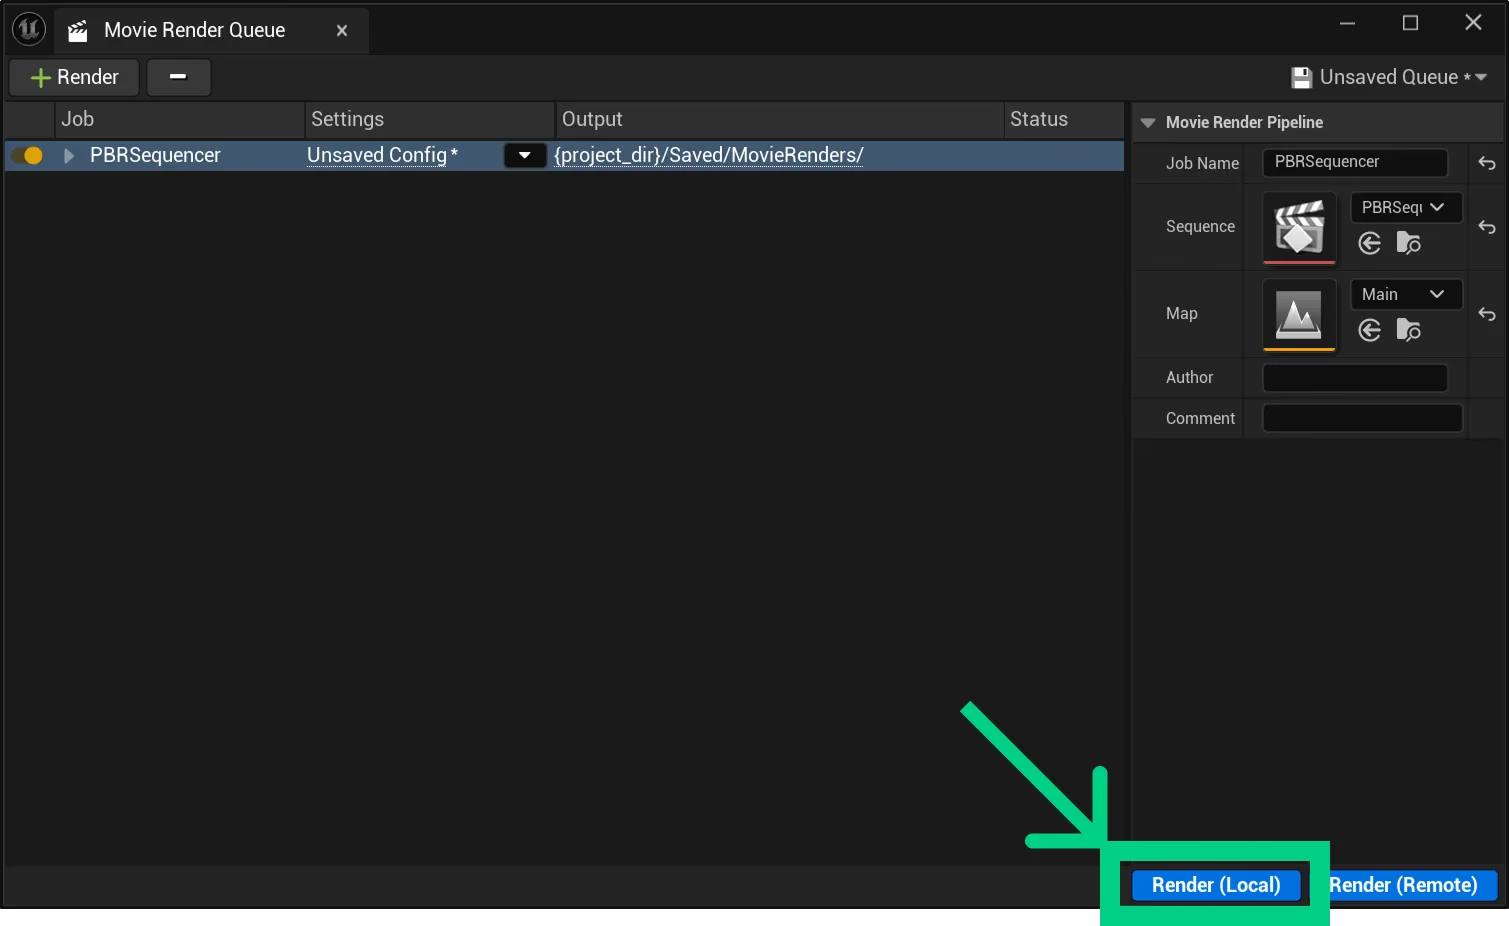
4. Click on the `Render (Local)` button. In case the `Movie Render Queue` window doesn't appear, verify that the `Movie Render Queue Plugin` is enabled.
5. Rendered results will be saved under your Unreal Project folder.
#### 3.3 Media Plane Controllability
> 💡 This section explains how to use the plugin's smart scaling features, which help maintain accurate projection and visual consistency as camera properties change.
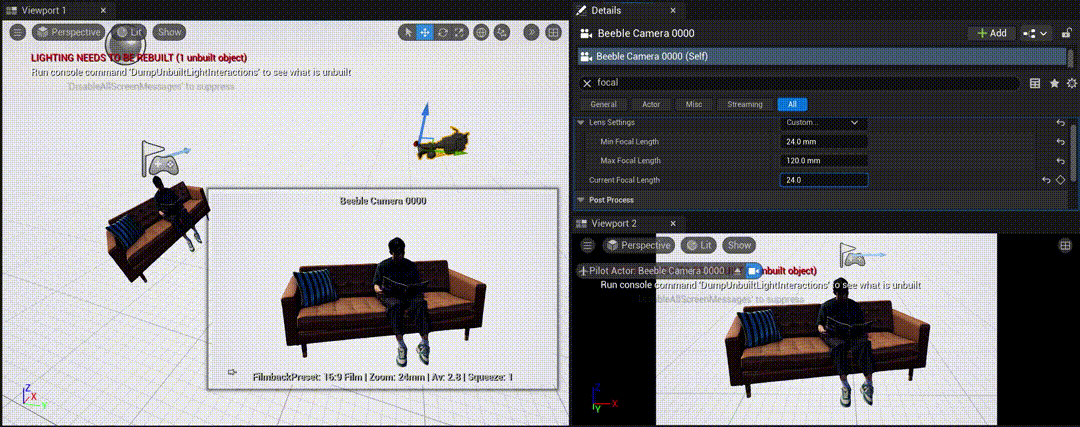
1. **Automatic Focal Length Scaling**: When you change the focal length of the `Beeble Camera`, the media plane, `Beeble Footage`, scale is automatically adjusted to keep the projected media correctly proportioned within the frame.
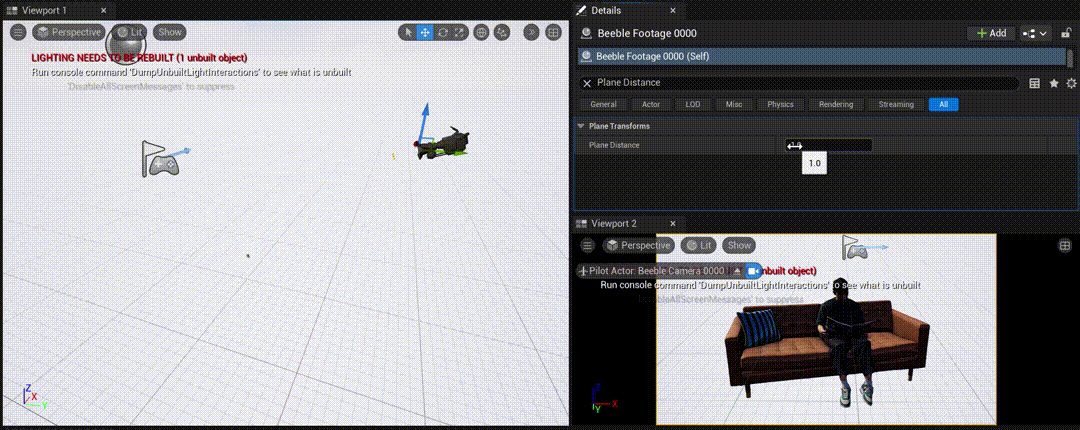
2. **Distance-Based Scaling**: When you change the distance between the `Beeble Footage` and the `Beeble Camera` using the `Plane Distance` setting, the plane automatically resizes to maintain proper proportions and accurate projection.
## FAQ
### Why do my rendered results in the viewport look too glossy?
Please make sure to enable high quality translucency reflections.
### Can I use path-tracing with Beeble?
No. Path tracing is designed to replicate how light interacts in the real-world. Beeble uses 2D planes to mimic 3D geometry, which disrupts the path-tracing process. For instance, a 2D plane in Beeble will block photons from reaching its front surface if the light source is behind it, making effects like rim lighting unachievable with path-tracing. Additionally, using path-tracing with Beeble can result in various artifacts.
### Which renderer should I use with Beeble PBR maps?
For rendering PBR (Physically Based Rendering) maps in Beeble, we suggest using ThreeJS, Unreal Engine 5's Lumen, and Blender's EEVEE. These renderers have been tested and confirmed to produce accurate results. To ensure proper setup of PBR maps, users are advised to use the official plugins provided for Blender and Unreal Engine, as the setup process can be complex.